| Silverlight Custom Bitmap Effects - more HLSL |
| Written by Mike James | |||||
| Monday, 26 July 2010 | |||||
Page 4 of 4

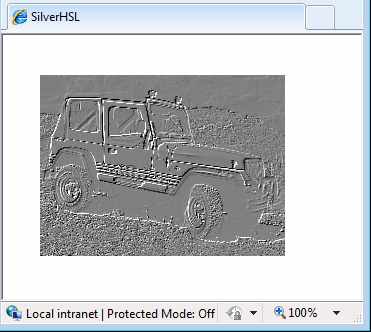
An embossed effectNow that we have most of the mechanics of creating a custom effect out of the way all that remains is to work out how to manipulate pixels to create good looking effects - this is a lifetime of fun. To demonstrate how things work let's try an embossed effect. This works by taking the difference between neighbouring pixels and converting the result to a grey scale image. The shader is fairly simple: sampler2D bitmap1:register(s0); The sampler is supplied by register s0 and this can be explicitly set as a brush or the default rendered brush. The main function starts off as usual and stores the color of the current pixel in result. Next it subtracts the color of the pixle 0.005 to the left of the current pixel. Notice the use of the .rgb selector or "swizzel" to perform a simple vector update. Only the difference between the RGB values is computed, the Alpha component is ignored. In the same way the next statement: result.rgb+=0.5;
only adds 0.5 to each of the RGB values. This changes the mean of the color values from zero to 0.5. Finally the color is removed by averaging the three color values. If you now create an EmbossEffect class with a suitable dependency property: public class EmbossEffect:ShaderEffect public EmbossEffect() You can now apply the new effect: Uri uri = new Uri(@"/SilverHSL;component/ The result can be seen below:
The embossed effect Summary of key points
Where next?All you really need to do now is to examine code written in HLSL to implement various effects and learn how to extend, modify and make your own up from scratch. Notice that you already know how to use multiple bitmaps within a shader, pass constants to control it and change the side of the rendered area. Notice that while Silverlight applications running in a browser don't actually use the GPU out of browser applications do. To access the code for this project, once you have registered, click on CodeBin.
<ASIN:073563887X> <ASIN:0470650923 > <ASIN:0470534044 > <ASIN:1430225491 > <ASIN:1430219505 > <ASIN:1847199763 > <ASIN:1430230185 > |
|||||
| Last Updated ( Tuesday, 27 July 2010 ) |