| Time to delete |
| Written by Harry Fairhead | |||||||
| Saturday, 11 July 2009 | |||||||
Page 3 of 6
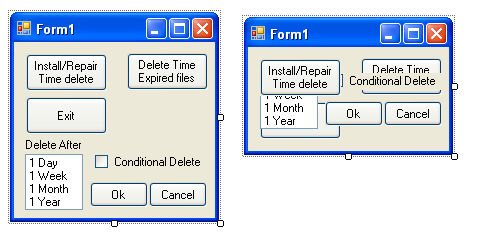
The user interface and designWhat we have to do next is to implement some code that allows the user to specify the lifetime of a file. There are so many possible ways of doing this that the whole project could grind to a halt as we try and work out which is best. For example we could add a task to the scheduler which deleted the file at the specified date. We could store a “delete time” property with every file and then periodically scan for files that have expired. In each case we have a choice of doing things in a distributed way, e.g. storing the expiry date in each file, or centrally, e.g. storing the details in the scheduler database. Each approach has its advantages, each scales differently and each has different reliability properties. The approach selected here isn’t going to suit everyone but it scales well and isn’t going to accidentally clog a machine – consider what happens, for example, when a machine has been switched off for three months is turned on for the first time and starts to deal with the possibly thousands of files that now need deleting! A safer approach is to store the details of the files in a simple text file and allow the user to choose when to process potentially time expired files. The first thing to do is to add a label, a list box, a selection box and two buttons to the form with captions OK and Cancel. Add some time periods e.g. “1 day, 1 Week” etc to the selection box. Arrange all of the new controls below the existing three buttons. When you are happy with the arrangement select all of the new items and drag them up the form to cover the existing three buttons. This may seem like madness but the idea is that we are going to add some code that hides the buttons that aren’t going to be used in a particular mode of operation. Size the form to fit the newly arranged controls.
First layout the new controls and then place them on top of the existing buttons
We need to do some initialisation in the form’s constructor for the new controls and we need to store the arguments passed to the application: private string[] m_args; The choice of what part of the user interface to show can be made on the number of arguments passed to the application. If it is passed more than once then the user is adding files to the list to be deleted and we need to see only the new controls. The controls we don’t need to see can be hidden as part of the Shown event: private void Form1_Shown( With this addition the user interface presents itself correctly to the user. This is a useful technique but clearly if the interface becomes more complicated it might become confusing and difficult to work with. <ASIN:0321562992> <ASIN:0596007124> <ASIN:157231995X> |
|||||||
| Last Updated ( Saturday, 11 July 2009 ) |