| Life in WPF |
| Written by Mike James | |||||
| Monday, 28 June 2010 | |||||
Page 1 of 4 Implementing the game of Life in WPF is an interesting project covering how to implement a user interface, casting as a way of creating default properties, and using timers. Life isn’t a game it’s more something to explore – and no I’m not talking about life but the cellular automata invented by John Conway. To know more about the theory read The Meaning of Life and for some up-to the minute news of potentially important life forms see It's life but not ...

If you just want to find out how to build a program that runs Life using WPF and C# read on. The project also contains a number of interesting examples of how to use WPF and .NET 4 features to make things simpler. RulesThe rules of Life are very simple. It is played on a rectangular grid and each position in the grid is referred to as a cell and it is either alive or dead but if you don't want to use emotive terminology 1 or 0 or true or false will do just as well! Starting from an initial configuration of cells the number of live neighbours that each cell has is counted. The neighbours are regarded as the eight cells that surround a cell in the grid. What happens next depends on the number of neighbours the cell has.
These rules apply no matter what the original state of the cell was. For example, if a dead cell has one or fewer neighbours it stays dead. This makes the rules very easy to apply. After they have been applied to every cell in the grid the whole procedure is repeated to give subsequent generations of cells. What is fascinating about Life is watching the way configurations change and grow into strange patterns. Sometimes colonies just die, sometimes they grow without limit and sometimes they settle down into a periodic variation or to a completely stable static arrangement - a so called "still life". 
The projectTo construct the program you will need to start a new WPF project called Life. The default window has a single Grid layout control. Add to this a Button, content "Run" and another Grid. Set the new inner Grid size to 300 by 300 and check that it has the name grid1 by editing the XAML directly or using the Properties window. The idea is that the inner Grid is going to be used to display the state of the cells, i.e. it is going to be the grid that Life is "played" on. To indicate the state of each cell in the grid we are going to store Shape objects at each grid location - one at each intersection of row and column. This may sound inefficient - and indeed to experienced Windows Form and GDI programmers it sounds very inefficient - but it works and it works at a reasonable speed for grids of up to 100 by 100. If you need bigger, faster grids then you probably need to look at alternative algorithms and optimised storage and presentation methods. The first thing we need to do is prepare the Grid. We need to create the required number of rows and columns so in the Window_Loaded event handler we write: private void Window_Loaded( The constant: const int GridSize = 20;
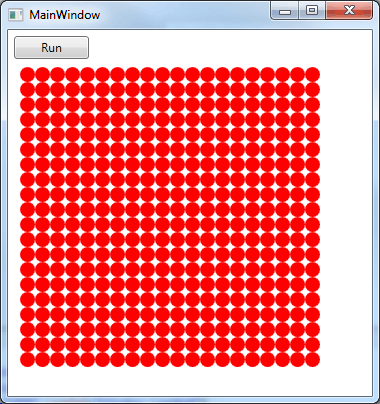
gives the size of the Life grid. Once the Grid has been initialised we need to add the shape objects at each intersection. This is the next part of the Window_Loaded event handler: for (int i = 0; i < GridSize; i++) If you run the program as presented so far you will see a grid of red circles.
The grid of ellipses Notice that we don't have to set the size of the Ellipses because they stretch to fill the space. Equally we don't have to set the row and column properties of the Grid - just accept the defaults and the Grid will portion out the space equally to each row and column. Sometimes when using WPF it pays to see if the defaults give you what you want rather than planning trying to set every property available.
<ASIN:1430225254> <ASIN:1847199763> <ASIN:0470502266> <ASIN:0470477229> <ASIN:159059990X> |
|||||
| Last Updated ( Monday, 28 June 2010 ) |