| WinRT JavaScript - Custom Controls |
| Written by Ian Elliot | ||||
Page 1 of 3 We have looked at WinJS controls and how to make use of them, but what do you do when the control you need doesn't exist? One solution is to create a custom control. As most of WinJS is just simple JavaScript with very little added, this is easier than you might expect.
This article is Chapter 8 of Creating JavaScript/HTML5 Windows 8 Applications.
WinJS controls are chunks of JavaScript that follow some simple rules that allow the system to run them when it encounters a tag with a data-win-control attribute. That is, when you call processAll it scans the HTML looking for tags with data-win-control attributes. It uses the value of the data-win-control attribute to work out what JavaScript function to call. The JavaScript function constructs the control usually by manipulating the DOM. For example, if you use a tag like:
then processAll will call
and this function acts as the constructor for the control. Sounds easy - and it is, but there are a few things that we have to get right if we want our custom control to work like the supplied controls - but first let's see how easy it can be. A Simple Custom ControlWe first need some JavaScript that creates something that we can regard as the "workings" of a custom control. We could use a range of other HTML controls to build a composite control but an interesting alternative is to demonstrate how a canvas element can be used to create a completely customizable control - what in other Windows contexts might be called a "self draw" custom control. The idea is that by using a canvas element you can draw anything you like to represent your control and arrange for it to respond in any way that you like - it is completely flexible. First we need to create a canvas element using nothing but JavaScript and draw something on it so that it is visible. if you don't know about using the canvas element then see: A Programmer's Guide to Canvas. First we create a canvas DOM object in the usual way and set its size:
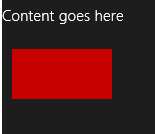
Next we get its drawing context and draw a red filled rectangle:
Name SpacesTo turn this chunk of JavaScript into a custom control we first need to set up a namespace. This isn't exactly essential but adding custom control constructors to the global name space is a recipe for chaos. In practice you are free to do what you like but it is worth trying to work withing the guidelines. If you recall a JavaScript name space is just an object that you use as a container for everything else you want to create and work with. WinJS provides a utility function
the first parameter is the name of the name space i.e. the object that everything else is defined within and the second is the object containing properties that you want added to the name space. For example:
adds nothing to the name space.
adds the variable total to the name space. Following this you can use
All of the properties contained within the object are added to the name space. If the name space doesn't exist then it is created. If it already exists the object is added which means you can use the define method to build up a namespace one object at a time. So let's call our name space MyControls and the particular control MyCanvasControl. We need to define a constructor within the name space :
we could define the constructor function somewhere else and just refer to it in the call to define but that would mean inventing yet more names. Better to define it within the function call. In this case the body for the function is just the code given earlier to create the canvas object:
Notice that the only thing that is new is that we append the canvas object to the element passed into the constructor. Putting all this together gives:
If you now modify the HTML to read:
and run the app you will see the canvas custom control appear below the "Content goes here" message.
You can of course include as many instances for the custom control on a page as you need. In this case take note of the fact that it is 500x500 pixels and so on the large size. |