| Remote C/C++ Development With NetBeans |
| Written by Mike James | ||||
| Monday, 23 May 2016 | ||||
Page 1 of 3 NetBeans is a great IDE for working with C/C++ and it supports remote build hosts, which is a good way to work. The only problem is that getting it all set up is more difficult than it needs to be. Find out how it works and how to get started.
NetBeans is primarily intended as a Java IDE but it does a good job of supporting C/C++. If you have been using just the command line and an editor to create C/C++ programs then it is worth trying out NetBeans - its free to use and open source and a lot better than Eclipse. If you are using a Linux or OSX based system then all you have to do is download NetBeans and install it. The compilers needed to make NetBeans work with C/C++ should be already installed. If you want to use NetBeans under Windows then you will have to install either mingw or cygwin to get the GCC compiler collection to work. An alternative is to use a remote build host and this turns out to be a good way to configure things no matter what you are working with Windows or Linux. It is particularly suited to developing programs for small single board computers like the Raspberry Pi - and this is going to be the example used in the rest of this article. The problem with small, single-board computers is that they don't have much computing power. They have enough to compile and run a program but not enough run an IDE at a reasonable speed. In this case running the IDE on a desktop or portable machine and using the single board computer as a remote build host is a good set up. It also means that you can change the build host quickly and try out the program on other machines. In this article I'm going to use a Raspberry Pi running Raspbian and a Windows desktop system but the methods are the same for any remote system using a Debian Linux and very nearly the same for other version of Linux. Prerequisites:
NetBeans supports two remote build host modes:
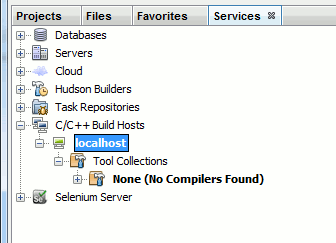
Of the two SSH file copying is the easier to get started with, but it can be slow and files that you change in the IDE have to be copied to the remote build host every time you compile the project. The directory sharing is more complex to set up, but once setup it works efficiently and simply. Let's start with the SSH file copying approach because it is very easy. If you have already managed to set up this sort of build host, skip to the file sharing section. Remote Build Server - File CopyingTo set up a remote build server that uses SSH file copying you need to have the remote Linux machine - a Raspberry Pi in our example - setup correct, connected to the local network and accessible using SSH. Your first task is to create a build host: To do this use the menu command Window,Services and drop-down C/C++ Build Hosts in the window that appears. If you are running NetBeans on a desktop machine then you might see some compilers or, under Windows you will see None(No Compilers Found).
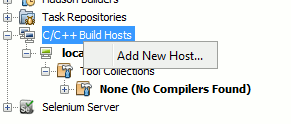
To work remotely we need to add the Pi as a build server. To do this right click on C/C++ Build Hosts and select Add New Host:
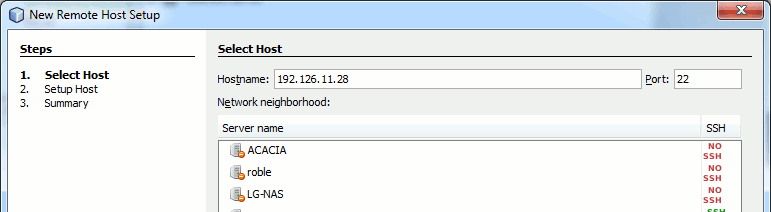
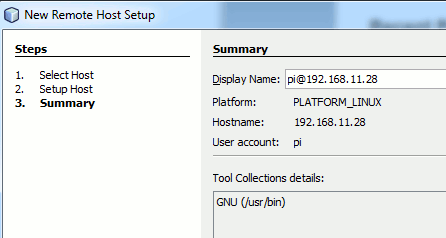
The dialog box that appears lets you set the identity of the build server.
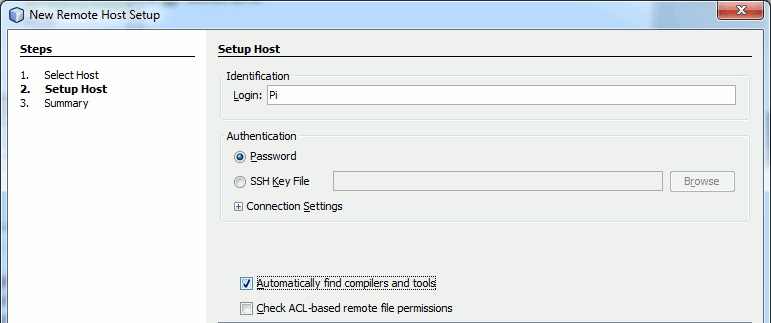
In most cases you will have to supply the IP address of the Pi unless you have set up Samba on it - and there are advantages to doing this but not when you are just getting started. The next dialog box that appears lets you type in a user name and specify how authentication will proceed. You can use a key file but in the first instance just use a password. You can use the default log in details of user name pi and password raspberry. Notice that these are both case sensitive. You will be asked for the password when you first connect to the Pi - this is of course the password that the user you specified needs to log into the Pi. This may seem obvious but with so many users and passwords involved in setting things up it can be confusing.
The final dialog box presents you with a summary of what you have set up:
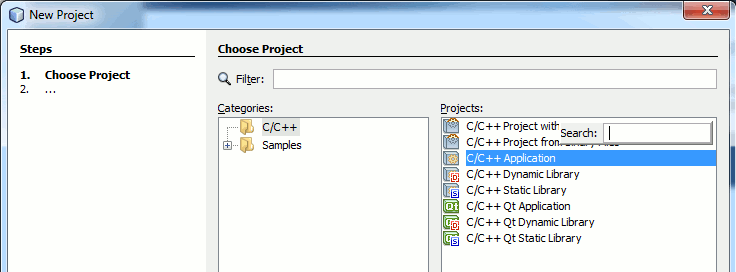
NetBeans should have found the C compiler and linker you are going to use as part of the GNU Collection. In a more general situation you might have to tell NetBeans where the compiler is or select which set of tools you want to use. In the case of the Pi and Raspbian you can leave the defaults as they are. If you now create a new project you can test out the new build host. Select File.New Project and select C/C++ Application.
The next dialog box is the one where you customize the project. You can give the project any name you like HelloC is reasonable for this first example. You need to select the dialect of C you are working in C89 is the most common choice. You can generally leave the rest of the entries at their defaults. Finally you to set the Build Host from the default Localhost to the build host you set up earlier. Now you can makes some changes to the project and run the program. When you do this any files that you have edited are copied to a corresponding folder in your home Linux directory. In this case HelloC.c is copied from the NetBeansProjects\HelloC directory to the /home/pi/NetBeansProjects/HelloC directory. If the folders on the Linux machine don't exist then they are created. NetBeans uses SFTP to copy the files and then it uses SSH to send commands to the build host to compile the files stored on the remote and run them on the remote. As SFTP depends on SSH you can see that if SSH isn't working then you wont even get as far as copying the files. About the only thing that can go wrong if SSH is working is that NetBeans will fail to copy the files. This is usually a permission problem and you need to make sure that the user you have specified in the build host set up can create folders and files in their home directory - which of course should always be possible. NetBeans doesn't always get which files to copy correct and this is one of the reasons why the file sharing method of remote building is often preferred. If this happens the simply perform a clean build. |
||||
| Last Updated ( Monday, 23 May 2016 ) |