| Using the ADO.NET DataSet Designer |
| Written by Alex Armstrong | ||||
| Wednesday, 19 January 2011 | ||||
Page 1 of 3 The DataSet designer is useful even if you don't want to work with an external database. However it does raise some difficult questions of how to work using strong typing.
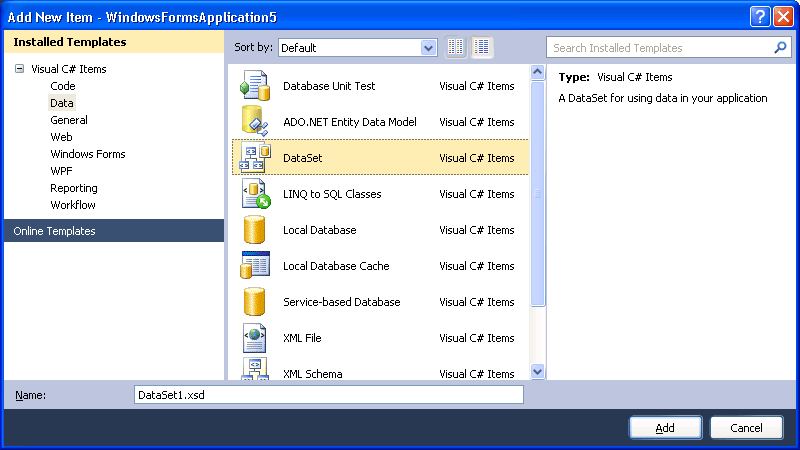
When you start to work with ADO.NET it can seem a very complicated collection of parts that only just fit together. The problem is that every time you need to do something new a new feature, facility or class seems to be magic-ed into existence. In fact each part of the ADO.NET framework has a specific purpose and they all fit together to do the bigger job. So it is with the DataSet designer which looks as if its only purpose in life is to integrate with a database stored on disk – nothing could be further from the truth. The DataSet Designer can be used to create a strongly typed DataSet class that can contain as many tables as you like without ever having to reference a database that exists elsewhere in the system. It can also be used to create suitable classes to work with data provided by any ADO.NET adaptor even if they don't correspond to database tables stored on disk. Put simply the DataSet Designer lets you create a data structure which is an in memory database. Creating a DataSetA DataSet class simply represents a dataset of the sort you might be familiar with in any database application - it is a collection of tables and each table is a collection of data columns. Just imagine a DataSet as if it was a class designed to encapsulate a database if this helps. If you aren't very sure about what a database is exactly don't worry all will become clear. Also notice that everything that the DataSet designer does can be done in pure code. The Designer doesn't generate code direct but an XML description of the DataSet. If you know about XAML you will recognise this idea of using XML to generate classes. No doubt if the Designer was being implemented from scratch today it would use XAML. To add a new typed DataSet class to your project all you have to do is use Project,Add New Item and select DataSet in the dialog box that appears. This works in all versions of Visual Studio including Express. We might as well accept the default DataSet name, DataSet1.
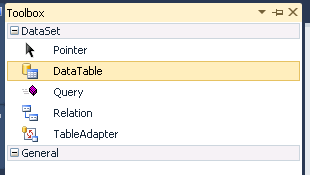
When the new DataSet class has been added you will see the DataSet Designer and it invites you to click on a link to go to the Server Explorer where you can supply all of the details of the database that the DataSet is to be associated with. What isn’t usually made clear is that you most definitely do not have to click the link and you don’t have to associate the DataSet with a database for the rest of the Designer to work. For example, let’s add a table with two columns – Event (String) and Date (Date). From the Toolbox simply drag and drop a DataTable and change its name in the Property window to ImportantDates.
Next right click on the table in the designer and add the two columns making sure to change their names and data types, again using the Property window. Event (String) and Date (DateTime). When you switch away from the Designer window it creates the code needed to implement a custom DataSet complete with the data table and with typed properties corresponding to the columns you added. Notice that the typed DataSet inherits directly from the DataSet class and, apart from the strong typing, many of the ideas work with an instance of DataSet as long as you cast from object to the correct data type as required. For an example of how this works see later. Working with the DataSetNow that we have a strongly typed DataSet and a table we can start to work with it. For example, create an instance of the DataSet:
DataSet1 MyDataSet1 = new DataSet1();To add a row we first need a strongly typed row object: DataSet1.ImportantDatesRow Row = The only difficult thing about creating a row is working out exactly what the method is that creates the row object. In general, while the row data type belongs to the DataSet, the creation method belongs to the table that the row belongs to. Now that we have a strongly typed row we can add some data values: Row.Event="My Birthday"; Notice that the row object has properties that match the type of the columns and no type conversion is necessary – provided you are assigning compatible types. Finally we can add the row object to the table: MyDataSet1.ImportantDates.Rows.Add(Row); If we have a DataSet containing some rows of data it can be accessed in the usual way: String temp=MyDataSet1. which retrieves the column data in row zero in the table. Notice that all of this has worked perfectly without any need for a Connection or a DataAdaptor let alone a database. You can treat the DataSet as just another data structure along with the array, the stack and struct. <ASIN:0735638888> <ASIN:1935182188> |
||||
| Last Updated ( Wednesday, 19 January 2011 ) |