| WinRT JavaScript - Templates & Data Binding |
| Written by Mike James | ||||
| Wednesday, 18 January 2012 | ||||
Page 3 of 3
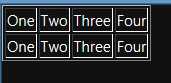
If you run the complete program then you will see a table with a single row. If you add a second identical call to render then you will see two rows and so on:
For completeness the body of the HTML file is: <body> The complete DOMContentLoaded event handler (with just one table row rendered) is: document.addEventListener("DOMContentLoaded",
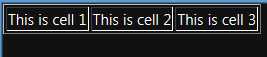
It would be a more convincing example if the Template render function would render a table row but the basic operating principles are clear and perhaps it will work as advertised in a later version. Data BindingOK you might be a little impressed by the Template object but the example of the table given above shows that it is less than perfect. Each row of the table is the same as the last one. What we need is some way of inserting data into the rendered Template and this is where data binding comes in. This is a very simple form of static databinding but it where the more complicated examples start from. The idea is that when you call the render method you can specify as the first parameter a JSON data structure, which will be used to initialize properties of the Template's contents. That is the full version of the render method is render(dataContent, container); Where dataContent supplies the data to be used to initialize the rendered content an the container specifies the element used to store the rendered content. The best way to understand how dataContent works is by way of a simple example. First we need a Template with one item of content with a data-win-bind attribute. To keep things simple let's use a <div>: <div id="Mytemplate" data-win-control= The data-win-bind attribute is always of the form element property: data source property In the case of our example data-win-bind="innerText:myText" the element property is innerText and the data source property is myText. When we call the render method we provide a simple object with a myText property set to the value that we want to apply to the template content. For example: template.render( If you run this program the innerText property of the <div> is set to "Hello World". The binding is static because after the Template is rendered any changed to the data source aren't reflected in the rendered object. There is one more complication. If any of the elements within the template have a data-win-bindsource=object; attribute then the specified object is used as the source of the data and not the one specified in the render method. Also if you specify a data-win-bindsource attribute on an element it applies to all of the elements nested within it. To make this all work however we need to dig a bit deeper into the data binding system. The bound tableAs a slightly more complex example let's go back to the table but this time add the data using data binding. First we need to revise the HTML to include data-win-bind attributes: <div id="Mytemplate" data-win-control= You can see that each of the <td> tags innerText property is bound to the cell1, cell2 and cell3 properties of the data source. The JavaScript is simple too: template.render( When you run this the table appears with a single row and the contents as specified by the data source object.
Of course you could have created the data source object else where in the program. The complete code using a separate variable to hold the data source object is: document.addEventListener("DOMContentLoaded",
Where nextIt has to be admitted that templates and data binding are of most use when use a ListView or other more complicated WinJS control. The idea behind using a table and other HTML elements with the Template and data binding was to try and illustrate that there is nothing really out of the ordinary going on. The Template object simply renders the elements within the template and sets the specified properties to the values specified in the data source. You should be able to see how you would implement this mechanism from scratch for yourself using nothing but standard HTML and JavaScript. To see how useful all of this is, we have to take a look at the ListView and related controls and this is the subject of the next installment.
Articles on WinRT JavaScript
Comments
or email your comment to: comments@i-programmer.info
To be informed about new articles on I Programmer, subscribe to the RSS feed, follow us on Google+, Twitter, Linkedin or Facebook or sign up for our weekly newsletter. + className "win-template" String + className "win-template" String |
||||
| Last Updated ( Wednesday, 18 January 2012 ) |