| Custom Projects In Android Studio |
| Written by Ian Elliot | |||
| Thursday, 16 January 2014 | |||
Page 1 of 2 Android Studio is developing rapidly. So rapidly that the documentation is getting well left behind. So how do you create a custom project or activity template? In particular how to you create a simple blank project type that doesn't use a fragment.
In recent versions of Android Studio the range of projects available changed and the simplest project you could create automatically makes use of a fragment to host the UI. While the idea of using a fragment even for the simplest application makes a certain amount of sense, there are times when working with the underlying window makes better sense. In particular our series introducing Android Studio and Android programming in general made use of the earlier simpler project type. From the point of view of teaching Android programming there are many advantages to avoiding the complexity of a fragment until later. As a result I Programmer needed to create a custom project template for a simple Android project that didn't use a fragment. This is the story of how it was achieved. One really important point: Any changes you make to any template files only take effect after you restart Android Studio. This does make testing messy and if you know of a better way please comment to let us all know. Template basicsAt the moment at least, Android Studio's templates are based on the Android ADT Template system, which is in turn based on FreeMarker. It isn't easy to find the documentation for this, so I have taken the liberty of posting it in the Resources and Tools section of I Programmer, see Android ADT Template Format Document . Templates are used to create entire projects and subcomponents such as activities. You can find out the details in the documentation quoted above. This article concentrates on creating a Template for a simple blank Activity as part of a blank activity project type. The first problem we have is locating where the template files are stored. At the moment, under Windows, these are in:
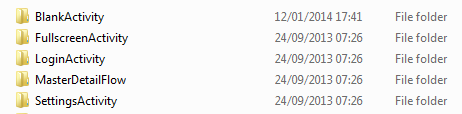
although this could change. One way to find possible template directories is to simply search for files ending in .ftl. The templates that we are interested in are located in the activities subdirectory. Each subfolder provides a new project or activity type. Currently there are four project types:
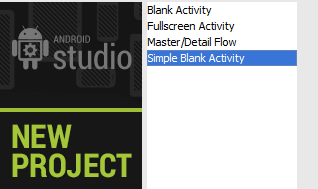
The simplest thing to do to create a new template is to make a copy of BlankActivity and rename it to whatever you like - in our case SimpleBlankActivity. This will give you a few icons and other bits and pieces that you don't really need in your finished template, but it is much easier than starting from scratch. Template.xmlJust adding the SimpleBlankActivity folder will cause Android Studio to list Blank Activity twice in the Activity types. To give your template an identity of it own, the first file you have to edit is Template.xml. If you load this into Android Studio or any XML editor you should be able to figure out what it is all about. It controls the options that the user is presented with as the final page of the New Project screen. In our case all we need to modify is the name variable to give the template a new name and we need to remove a number of parameters that are no longer needed. That is, we need to remove the parameter navType, and the parameter fragmentLayoutName. Everything else can be left as it is, but there are some optional changes you might want to make to tidy things up. You can find details of what sorts of parameters etc. you can define by looking at the documentation. Once you have seen an example it is fairly obvious. The final Template.xml is:
The globals.xml.ftl file sets up some variables which apply to all of the template files. In general you don't have to modify this as any global variables that it defines you can either use or ignore. What does matter however is the recipe.xml.ftl file, which is the script that sets up the project.

|
|||
| Last Updated ( Tuesday, 21 January 2014 ) |