| Accessing Salesforce Data from Angular.js |
| Written by Mohit Taneja |
| Friday, 25 July 2014 |
|
In this tutorial we show you how to sign up for a Salseforce developer account and build a connected app that gets contacts from the user’s Force.com account and shows them using twitter bootstrap.
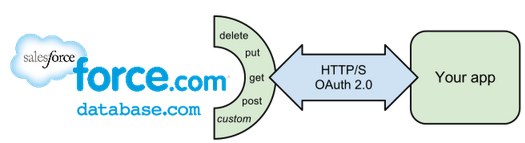
Salesforce provides CRM (Customer Relationship Management) software as a service. Force.com is a development environment that allows you to build cloud apps, as well as extend Salesforce CRM apps. You access Force.com through a web interface. It provides REST API’s to the developer to search, query, create, and modify standard or custom Force.com objects. Mobile and Web Developers are accustomed to using REST API’s to access any data or service provided by a backend server. AngularJS is a web framework developed by Google, which lets you write client-side web applications as if you had a smarter browser. It lets you use HTML or HAML (HTML Abstraction Markup Language) as your template language and lets you extend HTML’s syntax to express your application’s components clearly and succinctly. It automatically synchronizes data from your UI (view) with your JavaScript objects (model) through 2-way data binding. In this tutorial, we will integrate a simple AngularJS application, which allows the user to look at all the contacts in his or her Force.com account through a web application. Also, we will be hosting the app on Heroku as a node.js application. Force.com Account1. Go to https://developer.salesforce.com/signup, and sign up for your Developer Edition (DE) account. For the purposes of this example, I recommend sign up for a Developer Edition even if you already have an account. This ensures you get a clean environment with the latest features enabled. 2. Navigate to https://login.salesforce.com to log into your new developer account. Once, you have logged into your Force.com account, go to the Setup tab at the top right corner. Once the setup dashboard is there, go to Build->Create->Apps on the left bar. And create a new connected app (you might have to scroll down a little bit on the page to see this option). Connected apps in Salesforce Platform are a way to share your salesforce.com data with an external app using OAuth 2.0 authentication.
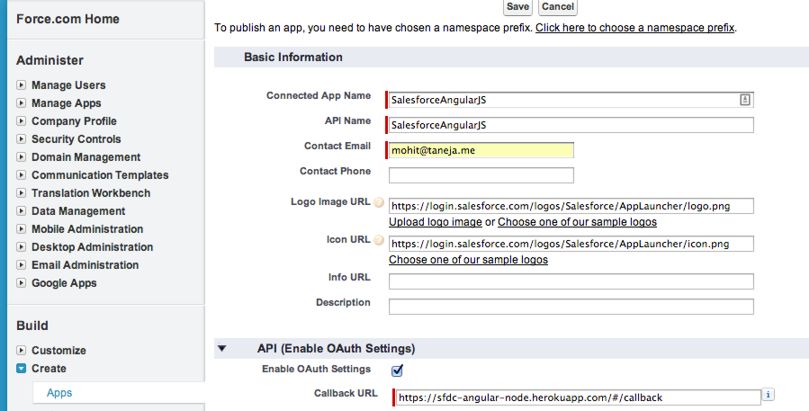
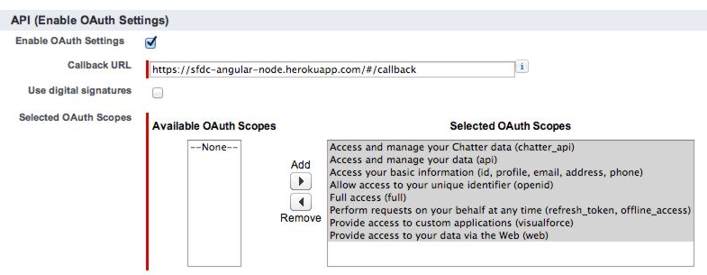
Fill in the name and contact email you want for your new connected app. Supply URLs for images to be used for its log and icon or choose from among the samples supplied which is what I did. Also, since we will be authenticating using OAuth, enable OAuth settings by placing a tick in the box and supplying the callback URL. This is the url through which OAuth authentication requests will be made to this connected app. In this case, since we are hosting our app on heroku, so our callback URL to enter is: https://<herokuapplicationname>.herokuapp.com/#/callback Also, OAuth scopes are just about your preferences about what permissions do you want to allow the application, with respect to your salesforce.com data and you can choose which you want using the Add and Remove buttons:
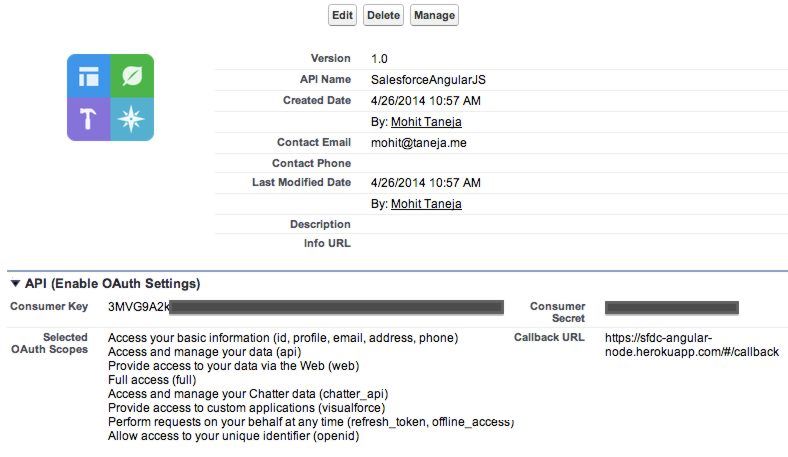
Once you have created the app you will be shown a completion screen, which shows the Consumer Key for your newly created app. Make a note of it as we will need it in later steps when we are configuring the heroku environment.
AngularJS ApplicationI have tried to keep our AngularJS app really short and simple, all it does is gets contacts from the user’s Force.com account and shows them using twitter bootstrap. I have adapted the code from sample code provided by salesforce.com. The final app, we are going to use for the tutorial can be found on github. Integrating Force.com API’s with AngularJS is made really simple by the angular-force.js script, which acts as a glue between forcetk mobile sdk and AngularJS. The angular-force.js script makes creating a factory in our AngularJS app, and linking it with forcetk mobile sdk really straightforward and simple. The code below creates a factory which is linked with the contacts in our Force.com connected app.
Check out the app.js file of the sample application to get a better sense of how the AngularJS code has been organized. Publishing App on HerokuNow is the time for the real action, to actually deploy the application on heroku. First of all, you would have to create a free account on heroku, to deploy the app, and also install the heroku toolbelt to work with it. Once you have the heroku toolbelt installed, first of all clone the sample code from github: git clone git@github.com:tanejamohit/sfdc-angular.git Move to the sfdc-angular folder and log into heroku with your credentials, and create a new app on heroku as outlined below:
cd sfdc-angular heroku login Enter your Heroku credentials. Email: Password (typing will be hidden): Authentication successful. heroku apps:create Creating fathomless-river-8320... done, stack is cedar http://fathomless-river-8320.herokuapp.com/ git remote heroku added
The important thing here is that the heroku app name (in my case it is fathomless-river-8320) should be the same as the one specified in the callback URL when we created the connected app.You can always go back to the Force.com dashboard and edit the connected app. The callback URL in my case would be https:// fathomless-river-8320.herokuapp.com/#/callback
Now once our heroku app is created, all we need to do is expose the Consumer Key, which we noted down while creating the connected app, and our application URL on heroku (in my case https:// fathomless-river-8320.herokuapp.com) to the heroku environment. The following steps will ensure that our app can access the salesforce.com data associated with the account.
heroku config:add app_url=[APP URL] heroku config:add client_id=[CONSUMER KEY]
Now, we can deploy the app on heroku by pushing our code through git: git push heroku master
The Force.com app should be live on your heroku app url. You can open it from your terminal too: heroku open The Force.com app will authenticate the user using an OAuth token and provide access to the contacts in the associated Force.com account.
ConclusionSo, building a Force.com app and integrating it with Angular isn’t so hard. Feel free to read more about how AngularJS works at https://docs.angularjs.org/guide and more about heroku with nodejs at https://devcenter.heroku.com/articles/getting-started-with-nodejs.
ResourcesForce.com REST API https://developer.salesforce.com/page/REST_API
Salesforce Mobile Pack for AngularJS https://developer.salesforce.com/en/mobile/getting-started/html5/ - angularjs
For a comprehensive set or resources, check out: https://developer.salesforce.com/en/mobile/resources
Related ArticlesBuilding Geo-tracking Apps with AngularJS, Ionic, and the Salesforce REST API Salesforce.Com Secrets of Success 2nd Ed To be informed about new articles on I Programmer, install the I Programmer Toolbar, subscribe to the RSS feed, follow us on, Twitter, Facebook, Google+ or Linkedin, or sign up for our weekly newsletter.
Comments
or email your comment to: comments@i-programmer.info
|
| Last Updated ( Friday, 25 July 2014 ) |