| Getting Started With Google's Android Things - Preview 2 |
| Written by Harry Fairhead | ||||
| Monday, 13 February 2017 | ||||
Page 1 of 3 Google's Android Things is a new IoT platform. It is based on Android, but the documentation lags behind the software. Find out what it has to offer and how to write your first program, which is, of course, Blinky. On the way we find out just how fast and efficient it is in both Java and C++. An earlier version of the article appeared for the initial preview of Android Things, but there have been important changes and additions so you need to re-read the article to keep uo to date.
We really do need a standardized operating system for the higher end IoT device. At the moment we basically have Linux and a range of different libraries and languages. Hence the news that Android Things is available in public preview is exciting, but there are some worries. In this article we look at how to get Android Things working and explore its capabilities. If you just want to know what Android Things can do and what it might not be able to then skip to the end. If you want to follow along in a hands-on manner you'll need a Raspberry Pi 3. You can also use a different device with a few minor and obvious changes. What Is Android Things?The first thing to say is that Android Things is a full Android OS with some omissions. You don't get the apps and the phone utilities are obviously missing. However, you can write Android apps to run on it using the same UI toolkit and other libraries that you are familiar with. It also means that you can use a language that you already know - i.e. Java. This approach is a lot like the cut down version of Windows 10 that is available for the Raspberry Pi, but in this case you can use the IDE and tools you are familiar with as well. This is all very promising, but there are some questions that will occur to you if you have done almost any IoT programming. The most obvious is how efficient is it going to be? On many devices this doesn't matter as they are effectively full servers capable off running quite demanding jobs. In short, they have computational power to spare so Java, which is usually regarded as slow compared to say C, might be OK. Another issue is how platform-independent is it? There are approaches to the IoT, like the mBed system, which go to great lengths to abstract away from the hardware so that programs in principle can run on almost anything. In practice of course this rarely happens because we tend to write IoT programs for specific hardware and moving them to other hardware is usually just a matter of mapping I/O lines. Another important issue is security, but at the moment the Things platform is too early in its development to know how well it holds up. What you can say is that it's Android and so should be reasonable, if not perfect. In short there is still a lot we don't really know about Things. So what do we know? At the moment the Android Things OS will run on the Raspberry Pi 3, Intel Edison, Intel Joule and NXP Pico. All three are fairly powerful boards compared to the sort of processor typically used for the IoT with the Pi 3 probably the most powerful. They are also relatively inexpensive boards to get started with, with the Pi 3 being the cheapest. It also has a GPU and this means you can use Android Things to create UI. The steps you need to take to make things work are almost identical on all the supported devices:
It sounds easy, but there are some interesting little problems on the way to Blinky, the traditional Hello World of the IoT. If you actually want to flash an LED, that's what Blinky does, you will need an LED and and a suitable resistor - see later. But you can just monitor the output pin with an oscilloscope, logic probe or even a multimeter. Setting UpYou need to download the OS image that is designed for your development board.
It is worth noting that for the Edison you can use the Arduino, the mini or the SparkFun breakout board. The software deals with the GPIO lines as they emerge from the Edison and not after any modification by the breakout board. What this means is that it is simpler to use the mini or SparkFun board - after all what is the point of using the Edison as an imitation Arduino? Download the system Image and in the case of the Raspberry Pi you simply copy it onto and micro SD card just as you would copy Raspbian or any other OS. If you don't know how to do this then look it up - for Windows you just need a copy of Win32 Disk Imager. For the Edison you download the image into the devices onboard flash memory using the Flash tool as always. Once you have the image installed you can boot the device. In the case of the Pi this is fairly simple, just insert the micro SD card. If you have an HDMI monitor this makes things easier because you will be able to confirm that it is working and see the IP address allocated. For the Pi the best setup is USB power, a wired network connection and an HDMI monitor. You can get away with out the HDMI monitor but you will need to find out the IP address by other means. With a monitor it is worth connecting the Pi to power and checking that it boots. After a few tens of seconds you should see the launcher page:
As long as you have the Pi connected to a network, its IP address will be listed at the bottom of the page. You can use a WiFi connection, but at the moment it is easier to work with a wired connection - there are enough things that can go wrong. If you have the launch page on display then you can move to using Android Studio. Of course if you are using a device with no display then you will have to trust for the moment that the OS has booted. Android StudioTo work with Things you don't need to install any special version of Android Studio or any addins. The programs that you create are perfectly standard Android programs with the addition of the Things Support Library. There are a number of ways of setting up the new library and the necessary Gradle configuration, but by far the easiest is to use the project "template". This isn't really a template but an empty project that you can add your own code to. Copy it down from GitHub as a zip and extract it into your Android Projects directory as it if was just another project. Once it has been copied, all you have to do is open it as an existing project. You need to now click the run icon to build the project. It is safer to simply build the template to make sure everything is working before you try any modifications. You need the latest Android SDK and tools. If you try to build the project and you get Gradle errors read the messages carefully because they will usually identify which component you have that is out of date. Simply click on the link to fix the problem and try again after the SDK, or whatever, has downloaded. Eventually you should get to a clean build ready to run. Instant run seems to work, but I found that it had a tendency to confuse the issue when trying things out and so I turned it off using File, Settings,Instant Run. Next we have to connect the device to the Android Debugger. In the Terminal Window Alt-F12 enter:
replacing the IP address with that of the device as reported by the launcher screen or discovered by other means, e.g. a DHCP list. If the adb command cannot be found then change directory or add the path to the Path statement: You should see:
which indicates a connection. In practice, you sometimes don't see this at once. The adb daemon sometimes has to be restarted, which happens automatically, and then the connection is made.
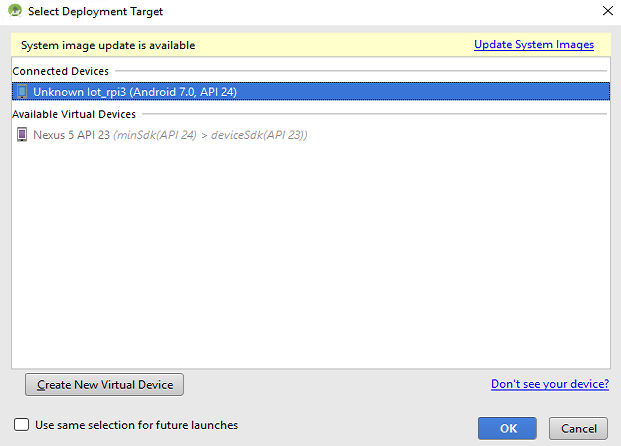
Sometimes you have to repeat the command to get it to work. There is also a very strange bug in the terminal, which means it truncates lines longer than about 80 characters. If this is a problem simply undock the window and resize it to be smaller than the full width required and the problem goes away. Until you see the connected message there is no point in trying to run the program. Also notice that, for reasons to be explained, the connection is sometimes lost or just doesn't work. The only thing to do in this case is reconnect using the same command. We have to hope that we get a standard USB debug connection in a future update. Once you have a connection you can try running the empty project on the Pi. After it compiles, which takes some time, you will be asked to select the connected device to run it on:
You can select Use the same selection for future launches, but occasionally you will need to restart to make things work. The empty project displays a blank user interface, which you can see as a white screen if you have a monitor connected and prints a message to the Android Monitor window which simply says onCreate:
If it doesn't work restart everything and try again. You can use the debugger to set breakpoints and to step through a program, but occasionally it seems to get into an odd state and you need to restart the device and Android Studio. <ASIN:1871962463> <ASIN:1871962447> <ASIN:187196251X> |
||||
| Last Updated ( Sunday, 26 March 2017 ) |