| Android Adventures - Getting Started With Android Studio 2 |
| Written by Mike James | |||||
| Thursday, 07 July 2016 | |||||
Page 3 of 4
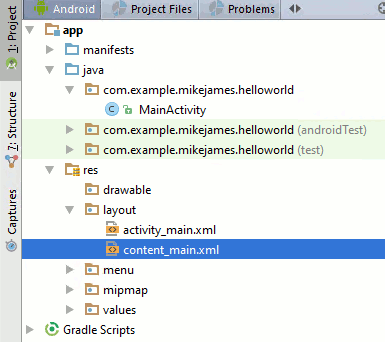
Basic Project StructureWhen the project has finished building all of the files created can be viewed by opening the Projects tab. The main thing to notice is that there are a great many folders and files. It seem almost unbelievable that the simplest Android app you can create involves so many files. Don't panic. Most of the files that have been created are autogenerated and most of the time you don't need to know anything about them let alone open or edit them. In fact opening and editing autogenerated files really isn't a good idea. So let's focus on the files that matter to us. For our simple program there are only two important files one that determines the Activity's behavior
and one that determines most of the visual appearance
You can set which activity is the one that the system starts but by default it is the single activity that you created and named when you set up the project. These are the default names assigned when the project was created you can change them but for the moment leave them as they are. You can see the location of these two important files in the Project window:
The java directory is from your point of view where most of the construction of your app occurs so make sure you know where it is. The res directory is where you store all of the resources - layouts, bitmaps etc. that you app needs. So while things look complicated at the moment the only two project files that matter to you, and your project, are MainActivity.java and content_main.xml. The two other folders in the java folder are concerned with creating tests for your program - this is not something that we need to worry about when first starting to write Android apps. Anatomy of an ActivityAn Android app is made up of one or more Activities. You can think of an Activity as being something like a web page complete with HTML to determine what displays and JavaScript to determine what it does. In the case of an activity the layout is determined by the XML file in resource (res) directory and the behavior is determined by the Java code in the Java directory. The XML can be thought of as a markup language much like HTML or XAML. It defines an initial layout for the screen when the app first runs. It is possible to generate new layout components at run time from the Java file. In fact if you really want to you can dispense with the XML file and generate everything from Java but as you will discover the XML markup approach is much the best way to do the job - because of the availability of the Designer.
So to be 100% clear:
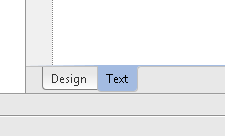
Let's take a look at the two files that have been generated for our initial Hello World application beginning with the XML layout. Hello DesignerFirst let us look at the XML layout file. Double click on content_main.xml file in the Project tab and the file will open (if it isn't already open). If it is already open you can also select its tab displayed just above the editor area. You can select any file that is open for editing by selecting the its tab. You can work with the XML directly to define where all the buttons and text goes and later you will learn at least how to edit it when things go wrong or to fine tune it but - Android Studio provides you with a very nice interactive editor and this is worth using. As you become more experienced the idea of switching between a design view and an XML view will become second nature. Think of the interactive editor as a very easy way of generating the XML that otherwise would take you ages to get right. If you look at the bottom left you will see two tabs - Design and Text:
You can switch between editing the XML as text and editing it in the drag-and-drop designer simply by clicking on the tab. If you now click on the tab the window will display the designer but be patient the first time you do this it might take a few moments. The designer looks a little too much to take in when you first see it but you will quickly get used to it.
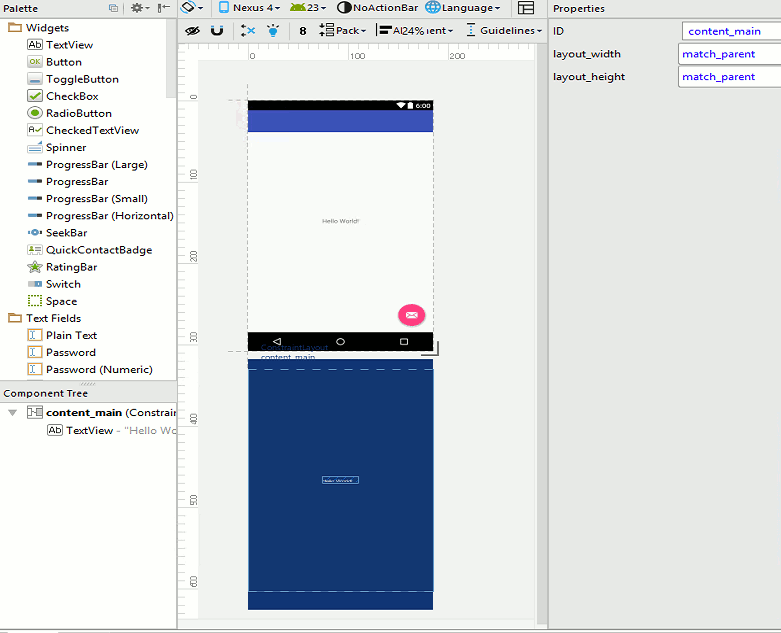
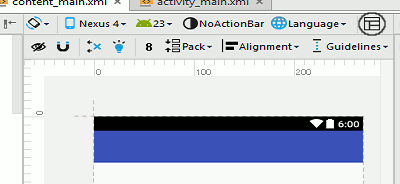
On the left is a Palette of all of the components or "controls" - buttons, text, checkboxes and so on - that you can place on the design surface. In the middle is the design surface and this defaults to the screen size and appearance of the Nexus 4. You can select other devices to work with. The two displays of the layout - either one on top of the other or side by side show you an actual layout view and a design overview. For simple application the design overview isn't necessary and in most cases it is better to recover the space it occupies for the actual layout. To remove the designer all you have to do is click on the designer icon at the top right of the design area:
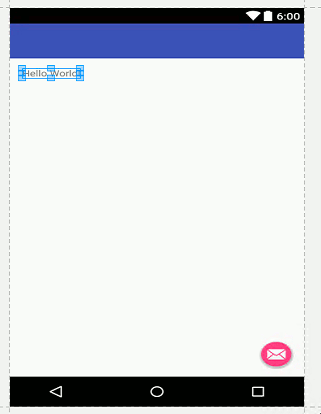
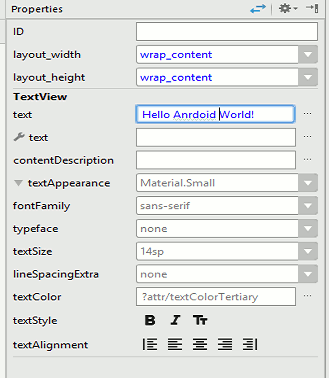
On the left, below the palette, you have the Component Tree which shows you the structure of your layout, that is how different UI components are contained inside others - its the same as the nesting structure of the XML file. You can use the Component Tree to select individual UI components by clicking on their names. You can also select components on the design surface but some times it is easier to use the component tree. On the right you have the Properties window that can be used to set the properties, such as width, height, color... of any component in the layout. If you have used any drag-and-drop designer then this one will be familiar to you. If you have struggled with the detailed layout using a markup language be it HTML, XAML or XML then you will like how easy the designer makes building and testing a UI. In the case of our sample program the only component uses is a single TextView already containing the text "Hello World". A TextView is the standard component we use when all we want to do is to display some static text.
You can modify the greeting text if you want to. Select the TextView component either on the Nexus 4 image or in the Component Tree and use the Properties window to find its Text property. Change this to read "Hello Android World".
You can use the designer to create any UI you care to and you really don't have to get involved in the XML that corresponds to the layout - unless that is things go wrong or you need to do something so sophisticated that the designer doesn't support it. |
|||||
| Last Updated ( Monday, 27 March 2017 ) |