| RenderTargetBitmap - Visual vector to bitmap |
| Written by Administrator | ||||
| Tuesday, 12 January 2010 | ||||
Page 1 of 3 RenderTargetBitmap will convert any Visual to a bitmap but sometimes it isn't quite as straighforward as just calling Render().

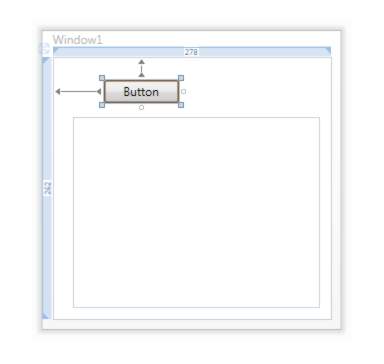
The most misunderstood and underused of the bitmap classes is probably RenderTargetBitmap. Its role in life is to allow you to convert the mostly vector based graphics that WPF uses to create a user interface to a bitmap. Part of the reason is that there is a second class that can convert vector to bitmap graphics in the form of the DrawingImage which is more directly connected with 2D vector graphics. Put simply RenderTargetBitmap will convert any object descended from Visual into a bitmap and DrawingImage will convert anything descended from Drawing object into a bitmap. RenderRenderTargetBitmap has a Render method that can be used to convert any class descended from Visual to draw itself on the bitmap. The classes that desend directly from Visual are: Visual-> Notice that RenderTargetBitmap inherits directly from BitmapSource and so has all of the methods discussed in the article on WPF bitmaps and WriteableBitmap and can be used in the same way. For example the CopyPixel method provides access to the individual pixel values. In this article we will concentrate on what makes RenderTargetBitmap special and this mostly means the Render method and its use. Notice that Silverlight does things differently and the this case the WriteableBitmap class has a Render method that works in a similar way but is much easier to use. Rendering a UIElementOne of the problems of using the RenderTargetBitmap is that it renders a Visual. This is at the heart of the WPF graphics system and it gives rise to complicated classes which can be difficult to use correctly. All of the WPF controls and most of the general graphics classes have Visual somewhere in their inheritance. What this means is that you can render most WPF objects to a RenderTargetBitmap. However, the way that the WPF layout and render system work makes rendering UIElements, which derive from Visual, more difficult than just submitting them to the Render method. In general to render a UIElement you need to know enough about the layout system to ensure that it is setup correctly to be rendered. As long as they are setup correctly you can render any controls, layout panels, text and general graphics to a RenderTargetBitmap. The first step in any use of RenderTargetBitmap is creating an instance of the class. This follows the basic steps in creating a BitmapImage or a WriteableBitmap in that the constructor requires you to specify the size, resolution and pixel format of the bitmap. The only complication, even though the documentation doesn't mention it, is that the only pixel format supported is Pbgra32. This is a format that many programmers will be unfamiliar with but it is very simple. It is a variation on the standard BGRA format, i.e. four bytes specifying Blue, Green, Red and Alpha, but with the Alpha value pre-multiplying each of the three colour values - hence "P" bgra. That is, to convert a Bgra value to Pbgra multiply each of the B, G and R values by A and then divide by 255 to re-normalise the colour values so that they fit into one byte. The Pbgra format is used because it is quicker to combine with an existing graphic taking the Alpha (opacity) channel into account. Notice that if the Alpha is 255 (Opacity 1) then Pbgra is the same as Bgra. To create a RenderTargetBitmap suitable for use with some simple examples the constructor is: RenderTargetBitmap RTbmap = This gives a 200x200 pixel bitmap with a resolution of 96 pixels per inch and the required pixel format. You can use: PixelFormats.Default in place of Pbgra32 with the same result. Now we need a UIElement to render and an Image control to view the results in. Position the image control near the top of the form but leave room for a button and set its stretch property to none and its horizontal and vertical alignment properties to left and top respectively. The XAML for the Image control should be something like: <Image Margin="0,60,12,12"
private void button1_Click( <ASIN:1590599551> <ASIN:0672328917> |
||||
| Last Updated ( Friday, 19 March 2010 ) |