| Custom BitmapSource |
| Written by Administrator | ||||||
| Monday, 03 May 2010 | ||||||
Page 1 of 5 Even if you don't anticipate implementing your own custom BitmapSource finding out how to reveals quite a lot about the way that WPF bitmaps work. 
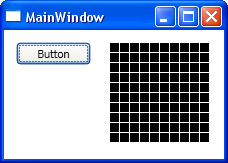
Many of the .NET bitmap classes are sealed and this can be very annoying - but the good news is that the core class BitmapSource isn't sealed and you can use it to base your own customized bitmap sources on. Even if you don't anticipate implementing your own custom BitmapSource finding out how to reveals quite a lot about the way that WPF bitmaps work. There are however some complications. The first is that BitmapSource is an abstract class and hence you have to provide overrides for all its abstract methods and properties. You might think that there could be a sneeky way around this task because you can, apparently create instances of this abstract class using its static Create method.Given that your custom BitmapSource inherits this implemented static method surely all you have to do is call it to create an instance of BitmapSource which you can then cast to your new type. There are many problems with this idea but the most obvious is that you can't actually perform the cast. The reason is that the Create method doesn't return an object of type BitmapSource but CachedBitmap. And, as CachedBitmap derives from BitmapSource it can't be "sideways" cast into your new class which also derives from BitmapSource. This is not to say that the inherited Create method is useless. It can provide instances of CachedBitmap created from suitable bit arrays that can be encapsulated within the custom BitmapSource to provide the behaviour the new class needs. More generally the problem with inheriting from an abstract class is that you don't actually get much of value from it. It is more like interface inheritance than true object oriented time saving inheritance. In this case however as we can actually instantiate a BitmapSource derived class we can use aggregation or encapsulation to avoid much reinventing the wheel. A test BitmapsourceImplementing a custom BitmapSource is complicated enough the first time you do it without adding to the difficulty. So as a demonstration of how you to do the job we will implement a simple test bitmap that shows a standard white grid on a black background - a sort of "test card" . The only parameters that are used to determine the test card are are the height and width of the bitmap, everything else is set to reasonable values.
A typical (100x100) test card bitmap Clearly we are going to have to generate the test card bitmap and the simplest way of doing this is to use an instance of BitmapSource. If you need to know more about how BitmapSource works then read BitmapSource: WPF Bitmaps. The constructorsTo get started we need to create a new class that inherits directly from BitmapSource: class TestBitmapSource : BitmapSource At this point you might expect to use some automated tool to implement the abstract methods etc. in the abstract class BitmapSource. This isn't what happens because all of the BitmapSource methods are virtual not abstract. What this means is that you can choose to override just the ones that you need to use. Of course the problem is which ones do you need to use? The only method that you are forced to override is the CreateInstanceCore method inherited from the Freezable class. This simply has to return an instance of the new type and this can be done using the default constructor: protected override Freezable we will return to the topic of Freezable in a future article but for the moment just accept that this method is necessary to create the new class.
<ASIN:0470548657> <ASIN:047050224X> <ASIN:0071668950> <ASIN:0470563486> <ASIN:1430272058> |
||||||
| Last Updated ( Sunday, 02 May 2010 ) |