| Mandelbrot Zoomer in WPF |
| Written by Mike James | |||||
| Thursday, 23 July 2015 | |||||
Page 2 of 4
First we need to create a WriteableBitmap ready to draw on.
Using a dpi specification of 96 makes the bitmap display at 100% size in an Image control of the same size. In this case the size of the bitmap is determined by the size of the Image control but this can be changed if you need a different size. If you need to know more about WriteableBitmaps then see: WriteableBitmap. Although the WriteableBitmap has "Writeable" in its name the way that this works is that you first create a byte array containing the new pixel data and store this in the bitmap. So first we need an array of the correct size:
The "stride" is simply the number of bytes in the array that correspond to a single "row" or horizontal line of pixels in the bitmap - which in this case is just:
Most of the difficulties of the calculation is in converting between different co-ordinate systems. In this particular situation we have three co-ordinate systems to contend with. The first is the mapping of the linear 1D array to the 2D pixels of the bitmap. Normally in building up a plot you would create a nested pair of for loops that scanned the rows and columns taking each pixel in turn, e.g. the pixel at i,j. You would then use a storage mapping function to convert the i,j co-ordinate into the location of the pixel as stored in the byte array. That is the data for pixel at i,j is stored in
notice that its i times the bytes it takes to store a pixel and j times the bytes it takes to store a row of pixels. Note the pixel data is at the BytesPerPixel locations starting at the indicated location. Instead of working this way why not simply scan through the byte array in any order and work out the i,j value that the index corresponds to in the bitmap. Then work out the x,y value that the i,j value corresponds to in the Mandelbrot set. That is we can use the inverse storage mapping functions and just work our way through the byte array computing the pixel data at each location. That is the array location:
corresponds to the pixel at px,py in the bitmap as given by:
Notice that the division is integer division which truncates to the nearest lower integer. Now that we have the position in the bitmap we can convert this to the location in the Mandelbrot set. This is just a case of a simple scaling and translation to map the rectangle (0,0) (PixelWidth,PixelHeight) into the rectangle (-2.4, -1.5) (0.8, 1.5). A little algebra gives
If you are puzzled as to why the y expression seems to have an extra minus in it - the reason is that the bitmap y co-ordinate py increases down the screen but the usual y co-ordinate increases up the screen. Of course these expressions are in terms of the particular rectangle that we are plotting. A more general expression can be written using the Rect area we defined earlier:
It also faster to remove anything that you can from inside the for loop that we can so first compute the scale factors:
Now we can start the for loop:
Notice that we are stepping through the array by the number of bytes needed to deal with one entire pixel each time through the loop. Although we could roll all of the co-ordinate transformation up into one big expression debugging is easier with them split into smaller logical units. First the pixel co-ordinates:
then the x,y co-ordinates from the pixel co-ordinates:
Now we have x,y it s possible to call the method that discovered if the point is in the Mandelbrot set or not:
The return value of count is going to use it to set the pixel's color. How exactly to do this? The four pixels starting at pixels[i] give the R, G, B, A components of the color respectively as byte values. Now we could use a method to map the count to a set of colors using a table say. However, given that we have been using so many storage mapping functions, we might as well use another one. The idea is to think of the count, which varies from 1 to 1000, as 1000 different colours arranged in a line. Now consider the RGB colour space as a cube of 10x10x10 different colours. The storage mapping function we need maps the 1000 linear colors to the rows, columns and layers of the RGB cube. More commonly the requirement is to map a 3D storage cube to a linear array but the inverse storage mapping functions map the cube to the array and this is what we need. A method to convert a count in the range 1 to 1000 to color values evenly spread across the RGB cube is:
With this method we can complete the plotting of the Mandelbrot set by setting the pixel color values:
This also completes the for loop.
All that remains to do is write the pixels to the WriteableBitmap and return the result:
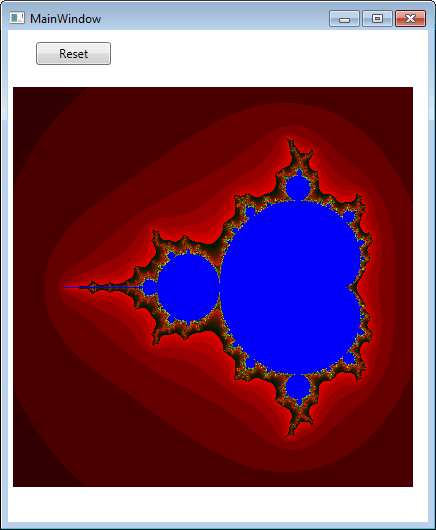
If you have got a bit lost in all of this coding you can check out the finished for loop in the listing at the end of the article. The initial co-ordinates give a good view of the entire Mandelbrot set from which the user can pick an area to zoom in on. Initially the zoom area is set to the entire display, which means no zoom is applied. Finally notice that you do need a button called “Reset” on the form to activate this initialisation routine manually - and this is our next task.
The initial view of the Mandelbrot set.
The reset button simply re-initialises the Rect and calls drawSet again:
|
|||||
| Last Updated ( Thursday, 23 July 2015 ) |