| Getting started with 3D XNA |
| Written by David Conrad | |||||||||||
| Friday, 30 July 2010 | |||||||||||
Page 7 of 7

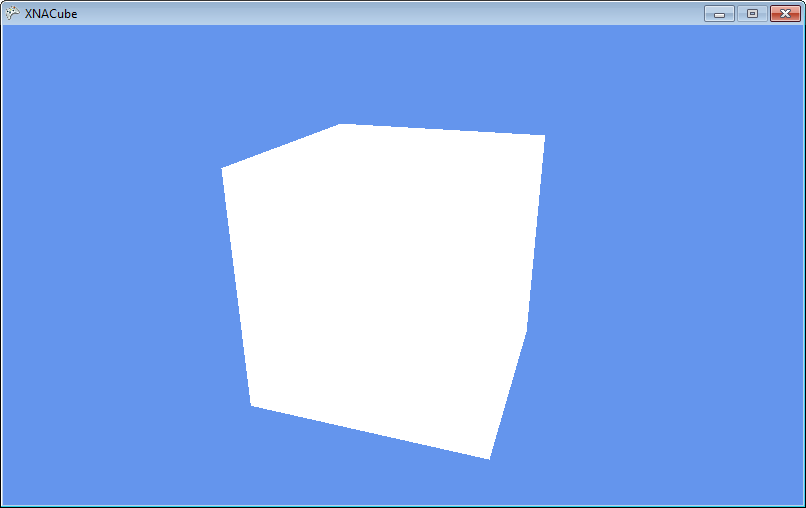
UpdateTo see something a little more interesting we can make the cube rotate by adding some code to the Update method to change the World matrix. We can set the World matrix so that the cube is rotated through a small angle about the Z axis and moved back into the screen 5 units so that it is more within the camera's view: private float angle=0; protected override void Update( It is important which order these transformations are carried out in because rotations are always about the origin. So if you rotate and then move what you see is a cube rotated about its centre. If you move and rotate then what you see is a cube orbiting the origin. Try it out to see how it works. What you should see is a rotating white cube.
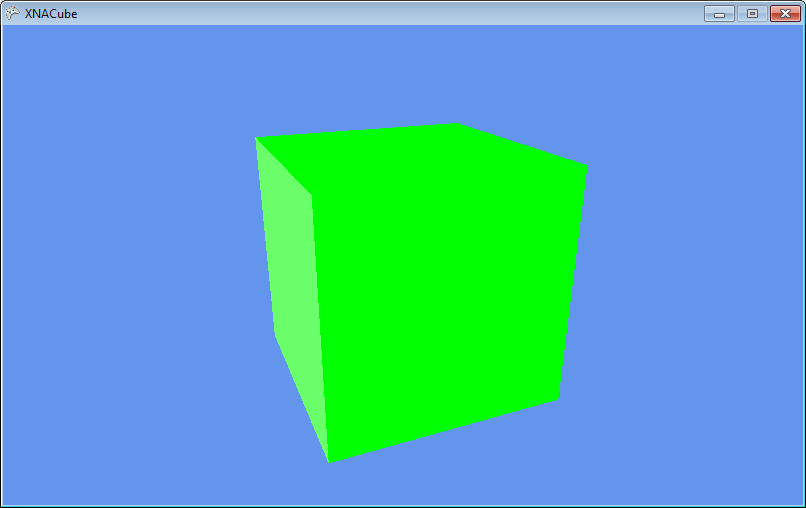
A rotating white cube To make the cube look more interesting we should now start to assign textures to the faces so that the cube has some material properties but this would take us into the next stage in developing a 3D world. An alternative is to modify the lighting so that the white cube looks different as it rotates. Change the AmbientColor property in the Initialize method to read: effect.AmbientColor = The colour is specified as Red, Green, Blue components and so in this case the surfaces will be coloured green. If you now run the program you will see a rotating green cube with a directional white light coming from the left. As the cube rotates you will see the side on the left reflect the white directional light.
That’s all there is too it and now you can go on to animate a whole range of objects. You can also move the camera as well as the objects to implement “fly bys”. The BasicEffect object is limited but you can learn a lot using it before you eventually need to move on to your own custom shaders but that’s another story. Explore the basic program to learn how things work. Try modifying the lighting. Move so that the direction lighting is from the top. Change the color. Add a specular color. Try moving the world view to see the cube move. Change the rotation to be about a diagonal axis. Another basic skill is working with more than one object so add multiple cubes at different locations. All of these are fairly easy but they do require a good grasp of the geometry, the co-ordinate system and vectors.To access the code for this project, once you have registered, click on CodeBin.
|
|||||||||||
| Last Updated ( Friday, 30 July 2010 ) |