| Building a Java GUI - Containers |
| Written by Mike James | |||||
Page 3 of 4
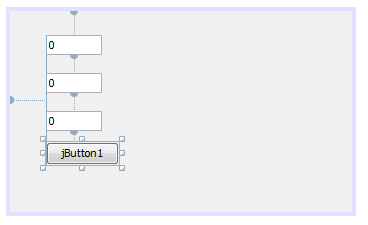
DialogsTo illustrate how the designer can be used to create custom containers let's create a small dialog box that does some simple arithmetic - adding two numbers together might not be very useful but it is easy to follow. It also creates a lot of detail that we have to delve into to make it all work. Working with the same project we started we need to add a dialog box. To do this right click on container under Source Packages and select New,Other and from the dialog box that appears select Swing Gui Forms and JDialog Form. Call the new dialog MyDialog. In the designer add three jTextFields and one button. Use the property inspector to set the initial values and captions to what ever you want to call them. In fact this is a good example to try out your layout skills on - add labels and generally attempt to make the dialog box look good, but do it after you have the program working.
Feel free to modify the layout, add labels and generally make it all look better. Next we need to add an event handler that will respond to the button being clicked. To do this the simplest way is to double click on the button in the designer. The designer then adds the code needed to create the event handler and transfers you to the code editor so you can type in some Java. The idea is that the user will type in a number to the first and second textfields and these are added together and the result displayed in the final textfield. Easy! But there are some irritating details. The first is that the value in the textfield is a string - that is text and not a number that you can add. So first we have to retrieve the text as as string:
Next we have to convert it to a number, an integer:
How do we know how to convert a string to an integer? You simply have to look it up in the documentation - and knowing such things is what makes the difference between a new and seasoned programmer. Now we have the contents of the first textfield in a numeric form. Time to get the contents of the second textfield in the same way however instead of writing this out as two lines lets combine the expression into one:
This is the way a seasoned programmer attempts to confuse the beginner but we all did this sort of thing as two easier to understand steps the first time around. Now we can create the sum of n1 and n2:
and store this back in the textfield so that the user can see the result. The problem is that n3 is a number and a textfield needs a string to work properly. The solution is once again to use a conversion method:
How did we know how to convert an integer to a string? The only way is to look it up in the documentation. Notice that there is no attempt at catching any errors in the above program. If the user doesn't enter a number then things go wrong. A realistic program would have to check that all input values were reasonable and of the correct type. The entire button event handler is:
Now we have a complete dialog box class that does everything we need. All we need to do is display it. You might think that this was just a matter of creating an instance as with the frame but no. A dialog has to belong to a frame it has to be the child of a parent frame. So what we need is an instance of a jFrame which has a button that the user clicks to create a dialog. If you go back to MyFrame2 in the designer and add a button you can add an event handler by double clicking on it. The event handler simply has to create and instance of the dialog box class. It has to supply the name of the frame that is the parent of the dialog and a boolean true/false value to indicate that the dialog is modal or not.
Notice the use of 'this' in the creation of the dialog instance. We need to pass the dialog the jFrame instance that it is the child of and this always refers to the current instance of the class. So when the MyDialog constructor is called 'this' is the name of the instance of jFrame that is creating the dialog. This is a general idea. Anywhere within a class definition you can use 'this' to refer to the particular instance that the code is running in. Also notice that the dialog box is set to be modal by the use of true in the constructor. In Java 6 there are four types of ways that a dialog box can be modal rather than just modal v non-modal. - see the documentation. Finally we need to return to the main program and create an instance of the jFrame class:
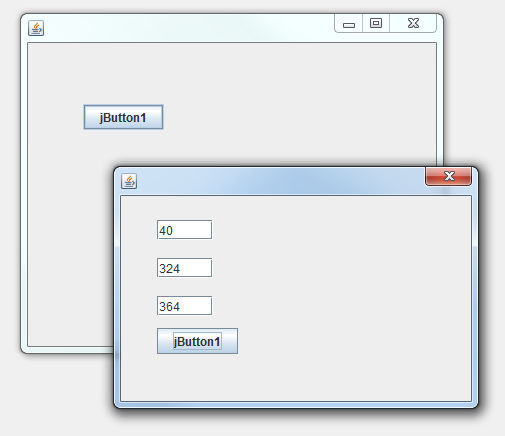
Now if you run the project the main method creates frame2 and if the user clicks on the button the dialog box opens and some arithmetic can be done. If the user closed the dialog box then another can be created by clicking the button again. If the dialog box was non-modal and the user closed the jFrame object then the dialog box object would be closed as well.
In a real dialog box it is usually to provide buttons to allow the user to dismiss the dialog box when they have entered some values but for this simple example use the close box in the corner of the window. Dialog boxes usually have OK and Cancel buttons or something similar.
|