| Graphics and Animation in Visual Basic |
| Written by Mike James | ||||
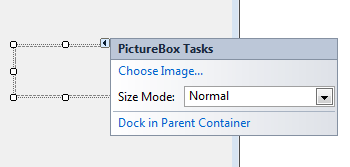
Page 1 of 3 Visual Basic makes it very easy to load and display images that have been prepared earlier and stored on disk or on a web server. Not only does VB make this easy, with the addition of the Timer control making things move is very easy indeed. In this chapter of the eBook Master Visual Basic 2010, we look at how to display an image, animate an object and meet the idea of objects that don't necessarily have a visual representation, i.e. objects that are not controls. Step One - The PictureBoxThe PictureBox is a full control which has all the properties that you have encountered but it is special in that it can be used to display an image. To try it out start a new VB Windows Forms project and drag-and-drop a PictureBox onto the form. The PictureBox has a range of standard properties and methods and some that allow you to load an graphics file and control how it is displayed. The most important of these you can work with by clicking on the small arrow icon in the top right.
As a general tip you should always lookout for the small arrow icon to work with the standard tasks needed to customise a control. In this case you can achieve the same results working with the Properties window or writing code but for some controls a Wizard is provided which makes things much easier.
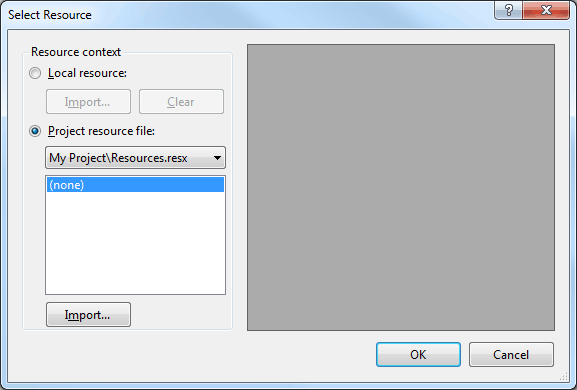
Step Two - The Image PropertyThe most important property of either type of control is its Image property which specifies the graphics file that will be displayed.You can display a file in GIF, BMP, JPEG, PNG or TIFF format. The list can be extended by loading custom decoders but this is usually enough. Setting the bitmap to display a file can be done using properties or in code. The most difficult part of the task is ensuring that the file you want to display is in the location you specify or if you want to put it the other way round ensuring that the location you specify really is where the file is stored. In the example program a PNG file called Off.png is stored in the project directory in Debug i.e. in project\bin\debug The image file is included in the download stored in the CodeBin - see later. If you now click on the right arrow or try to set the Image property in the Properties window the Select Resource dialog box appears. This lets you specify two different way of working with files. You can select Project resource file or you can select Local resource. The difference is that if you select Project resource file the image file is copied into the project and it gets distributed with the application automatically. If you select Local resource then the file is left where you put it and it is just used by the program. Of course this means that if you distribute the program to other people you have to make sure that you include a copy of the file and make sure it is stored in the correct location.
Of the two Project resource file is often the better choice, but for simplicity and generality we will use Local resource in this example. So select Local resource. click Import and navigate to the file you want to load into the PictureBox. When you click OK you will be able to see the image in displayed by the PictureBox.
Step Three - Controlling the imageThere are a small number of properties that you can set to control how the image is displayed in the PictureBox. The most important is the Size Mode property.
If you set this to Normal then the image will be displayed in the PictureBox at its correct size. If the picture box is too small then you only see what fits into the display area and it is too big the image is surrounded by a Background fill . If you set this to StretchImage the graphic is scaled so that it fills the current size of the PictureBox. Zoom works in the same way as StretchImage but the scaling doesn't distort the image i.e. it keeps the aspect ratio fixed. Of course this means that the image might not fill the PictureBox in one dimension. If you set this to AutoSize then it is the PictureBox which changes its size to always fit the size of the image being displayed. CenterImage works like Normal but the image is centered rather than being in the top left hand corner. Step Four - Moving picturesThere are many uses for a PictureBox control. You can just use it to display a photograph on a form say but one of the most common is to create an animation effect. This can be done in one of two ways. The first is that you can actually move the graphic by changing its Top and Left properties while the program is running. The Top and Left properties are applied to all controls and specify the position of the top left hand corner. By changing them as the program runs you can make a control appear to move. For example, if you place an Image control called PictureBox on a form along with a button called Button1 then you can define the button's click routine to be: Private Sub Button1_Click( This will make PictureBox1 move 10 units diagonally each time the button is clicked. You can use the same technique to move any control. To achieve free movement however, i.e. movement that doesn't depend on clicking a button, you also need to know about the Timer control. The only problem with using Top and Left in this way is that the control is redrawn after each change. This means that it actually moves horizontally and then vertically in a sort of steppy fashion rather than along a smooth diagonal. To make a control move smoothly it is better to use the SetBounds method. We haven't really discussed methods as yet but you can think of them as additional commands that apply directly to objects. For example, to move a control called Image1 to a new location and change its size you would use PictureBox1.SetBounds(x, y,w,h) where x and y are the new settings of Left and Top respectively and w and h specify the new width and height. Of course the problem here is that if you only want to move the control you have to still specify its width and height. There are a number of ways around this problem that work in general but for the PictureBox control we can use a simple trick that means that w and h are ignored. If you set the PictureBox to AutoSize then it doesn't matter what size you set it to be it will ignore your specification and resize itself to fit the image being displayed. So using SetBounds and assuming that Size Mode is set to AutoSize the previous example becomes: Private Sub Button1_Click( Notice the use of Left and Top within the Move method. This simply makes the control move 10 units diagonally from where it currently is positioned. Also notice that the only reason that setting the size of the control to zero is that it auto-resizes each time to fit the image. <ASIN:0470502215> <ASIN:1430226021> <ASIN:0132152134> |