| Serial C And The Raspberry Pi |
| Written by Harry Fairhead | ||||||
| Monday, 29 August 2016 | ||||||
Page 2 of 5
Linux gets in the wayNow we come to a difficult problem. Serial interfaces have long been Linux's and before this Unix's way of connecting to the outside world. As a result there is support for serial consoles built into the Kernel. When Linux boots up Linux generally configures at least one serial interface to work as a console. What this means is that your program cannot simply connect to the serial interface because Linux is already using it. What happens when something connects to the serial interface is that Linux issues the prompt to log in and then presents the user with a command line interface. If this is what you want to do then you can make a serial connection to the Pi either over the full UART serial interface or over a USB serial connection. This isn't difficult, but it is not what we are trying to do here. We want our programs to have full control of the serial interface so as to be able to send and receive what data they want to without any interference from the operating system. What this means is that we have no choice but to alter the configuration of Linux so that it doesn't claim the serial interface. At this point, if you know about the GPIO, you might be tempted to sidestep Linux altogether and simply resort to programming the UART directly via its control registers. While this is possible. you would still have to disable the Linux serial driver to avoid problems. Once you have stopped Linux from using the serial port as a login console the driver itself isn't a problem and you might as well use it as a way of controlling the serial port. Unfortunately everything has become more complicated with the arrival of the Pi 3 which has introduced breaking changes into the latest version of Raspbian. These mean that most of the existing examples of using the serial port on the Pi no longer work. Due to the Pi 3's support for Bluetooth the full serial interface is now used by the built-in Bluetooth device and the console uses the mini-UART with all its clock problems. By default a serial console is configured on all versions of the Pi. On the Pi 2 and earlier this is ttyAMA0 which is the full UART. On the Pi 3 this is ttyS0 because the full UART is used for Bluetooth. To allow for this difference to be transparent there are two new symbolic links which are used to refer to the UARTs according to their use. On a Pi 3 there are two links:
On the Pi 2 and earlier there is just one link
as there is no point in setting up ttyS0 because it uses the same GPIO pins as ttyAMA0. You can check that serial0 has been defined using:
So if you always use serial0 you will be using the UART that is assigned to the console, be it running on a Pi 3 or any other Pi. The only problem is that ttyS0 isn't a good UART to use for general purpose communications because its clock speed is linked to the core clock and this varies in speed unless you select a fixed frequency, which slows the Pi 3 down. You can use the full UART, ttyAMA0, even on the Pi 3 if you are prepared to accept either a fixed clock frequency or disable Bluetooth. To swap the use of the UARTs you have to edit boot/config.txt
and add the line
Save and reboot and on a Pi 3 the two serial ports will be redefined as
If you want to disable Bluetooth completely you can add
to the end of /boot/config.txt Getting rid of the consoleWhichever UART is assigned to serial0 Linux will use it as a console. This is exactly what you want if you plan to connect using a terminal program such as PuTTY or miniterm. If you do this you will see the usual logon appear and you can start using Linux as normal. This isn't what you want to happen if you are writing a program to transfer commands and data to another device. To stop Linux responding you have to stop it using serial0 as a console. There are a number of ways of doing this. The simplest is to use:
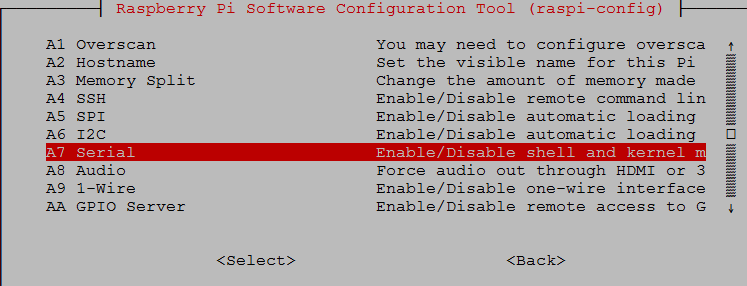
select Advanced and disable the serial console in the GUI that appears:
However, if you do this you will discover that any programs you write fail with an error that says there is no such device as serial0. The reason is that if Linux isn't using serial0 as a console, it simply doesn't set up the serial port. This seems a reasonable idea, but if you want to use it then the Linux driver for it has to be initialized. To make the system do this you have to add to /boot/config.txt:
and reboot. Setting enable_uart to 0 disables the UART and setting it 1 enables it. You also need to remove any mention of serial0 in /boot/cmdline.txt using:
You generally have to remove
Another, and arguably neater, way of doing the same job is to use the systemd systermctl command to stop the serial console service. For example, to stop ttyAMA0 you would use:
After this your program is free to use the ttyAMA0 UART until the next time the system boots. If you want to disable the service for subsequent boots then use:
Of course if the service you want to make use of is ttyS0 use the commands to stop and disable that instead. Notice that neither of these commands change /boot/cmdline and so you probably won't have to modify enable_uart, but it is worth checking. If you don't want to modify the operating system configuration, a reasonable approach is to execute the stop command from within the program. The proper way to do this is to learn about systemd and dbus, but a simpler way is to use the system command which can be used to run another program. To disable the use of ttyAMA0 as a console all you have to do is:
and do this before you open the file. You should check for an error if the system function returns -1. When you are trying to debug a serial port then:
Opening The Serial PortThe basic principle of Linux is that everything is a file - and so it is with the serial port. A file is just something you can read data from and write data to and this is also true of most devices. As a result Linux is fairly safe in treating the serial port as a file, but there are some important differences between a file on disk and a serial port that is being treated like a file. To use the serial port we have to open it as a file in the usual way. The only thing that might be problematic is that you have to specify the device name in place of a filename and this can change - indeed it changed in the latest version of Raspbian and so invalidated most of the examples of using the serial port. To work with the serial port you need to include:
and to make error handling easy you might as well include
To open the serial port we use:
Notice the name of the device and that we specify that we want to open it for read and write and the NOCTTY constant specifies that the serial port should not kill the process is a Ctrl-C is received. |
||||||
| Last Updated ( Thursday, 01 December 2016 ) |