| Pi IoT In C Using Linux Drivers - The PWM Driver |
| Written by Harry Fairhead | ||||||||||||||||||||||||||||||||||||||||
| Monday, 10 May 2021 | ||||||||||||||||||||||||||||||||||||||||
Page 2 of 3
Simple PWM FunctionsThe big problem in using the PWM driver is in avoiding opening and closing files, which is a slow operation. A better idea is to implement a function that can work with the driver without closing the frequency and duty cycle files until no longer needed: #define _DEFAULT_SOURCE
#include <stdio.h>
#include <stdlib.h>
#include <errno.h>
#include <unistd.h>
#include <fcntl.h>
#include <string.h>
FILE *doCommand(char *cmd)
{
FILE *fp = popen(cmd, "r");
if (fp == NULL)
{
printf("Failed to run command %s \n\r", cmd);
exit(1);
}
return fp;
}
void checkPWM()
{
FILE *fd = doCommand("sudo dtparam -l");
char output[1024];
int txfound = 0;
char indicator[] = "pwm-2chan";
char command[] = "sudo dtoverlay pwm-2chan";
while (fgets(output, sizeof(output), fd) != NULL)
{
printf("%s\n\r", output);
fflush(stdout);
if (strstr(output, indicator) != NULL)
{
txfound = 1;
}
}
if (txfound == 0)
{
pclose(fd);
fd = doCommand(command);
}
pclose(fd);
}
enum pwm
{
    OpenChan,
    SetFreq,
    SetDuty,
    EnableChan,
    DisableChan,
    CloseChan
};
int pwmAction(enum pwm action, int chan, int param)
{
static int fdf[2];
static int fdd[2];
int fd;
char buf[150];
char schan[2];
int L;
if (chan != 0 && chan != 1)
return -1;
snprintf(schan, 2,"%d", chan);
switch (action)
{
case OpenChan:
checkPWM();
fd = open("/sys/class/pwm/pwmchip0/export",
The pwmAction function accepts an initial command parameter which controls what it does. The command can be one of: enum pwm
{
OpenChan,
SetFreq,
SetDuty,
EnableChan,
DisableChan,
CloseChan
};
If you open a channel then the frequency and duty cycle files are opened and the file descriptors saved for the other commands to use. After opening a channel you can set the frequency and the duty cycle and then enable the channel. Using the function is easy - you simply supply the action as the first parameter, the channel 0 or 1 as the second, and the third is either the frequency or the duty cycle or ignored. For example: int main(int argc, char **argv)
{
pwmAction(OpenChan, 1, 0);
pwmAction(SetFreq, 1, 10000000);
pwmAction(SetDuty, 1, 8000000);
pwmAction(EnableChan, 1, 0);
pwmAction(OpenChan, 0, 0);
pwmAction(SetFreq, 0, 10000000);
pwmAction(SetDuty, 0, 2000000);
pwmAction(EnableChan, 0, 0);
}
If you don’t like having to supply extra parameters you can use C90’s variable parameters. Change the function definition to: int pwmAction(enum pwm action, int chan, ...)
{
static int fdf[2];
static int fdd[2];
int fd;
int param;
char buf[150];
char schan[2];
va_list params;
int L;
and change the SetFreq and SetDuty case clauses to: case SetFreq:
va_start(params, chan);
param = va_arg(params, int);
L = snprintf(buf, 150, "%d", param);
write(fdf[chan], buf, L);
break;
case SetDuty:
va_start(params, chan);
param = va_arg(params, int);
L = snprintf(buf, 150, "%d", param);
write(fdd[chan], buf, L);
break;
return 0;
You will also need to add: #include <stdarg.h> Now you only need to supply the third parameter when the action makes use of it. The full variable parameter version can be found on the book’s page on iopress.info. Clocks and Duty Cycle ResolutionIf you just take the PWM driver at face value then you might believe that you can set any frequency and any duty cycle – this is not the case. Due to hardware limitations, the resolution of the duty cycle depends on the PWM clock frequency and this also governs the highest frequency PWM signal you can create. The situation with the Raspberry Pi is complicated by the fact that the PWM clock is set once when the device is booted. Any changes to the clock that occur after boot are not reset by loading the PWM driver and any changes can result in the driver setting the wrong frequency and duty cycle. The effective PWM clock is 20MHz in an unmodified just rebooted Pi Zero and Pi 4. The importance of the clock is that the PWM signal can only change once per clock pulse. What this means is that the highest frequency that you can use is 10MHz with a 50% duty cycle: If you select a duty cycle other than 50% then you will get either 100%, 50% or 0% depending on which value is closer to the desired value. In practice, you will also see some strange behavior for anything other than 50%. A program to produce the highest frequency is: int main(int argc, char **argv)
{
pwmAction(OpenChan, 0, 0);
int t =100;
pwmAction(SetFreq, 0, t);
int d = t/2;
pwmAction(SetDuty, 0, d);
pwmAction(EnableChan, 0, 0);
}
The number of different duty cycles you can achieve depends on the number of clock pulses in the total period. At 10MHz there are just two clock pulses and so just three duty cycles 0%, 50% and 100%. You can easily work out the number of duty cycles available at any given frequency:
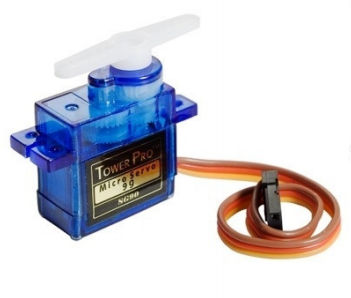
In many applications 8-bit resolution for the duty cycle is considered the minimum acceptable and this sets the highest frequency to about 75kHz, which is high enough for most things. For example, if you want to control a servo motor, see later, then you need a PWM signal with a frequency of 50Hz and at this frequency you can specify the duty cycle down to about 25 bits or around 40 million increments – more than enough for any real servo motor.
|
||||||||||||||||||||||||||||||||||||||||
| Last Updated ( Wednesday, 12 May 2021 ) |