| Micro:bit Getting Started With C/C++ |
| Written by Harry Fairhead | |||||
| Monday, 05 September 2022 | |||||
Page 3 of 4
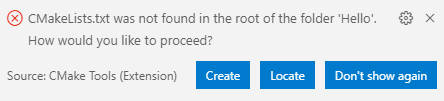
Next you should be asked for the location of the CmakeLists.txt file. Usually this is stored in the root, but in our case it is in build/bbc-microbit-classic-gcc. Select Locate and navigate to this folder and select the CmakeList.txt
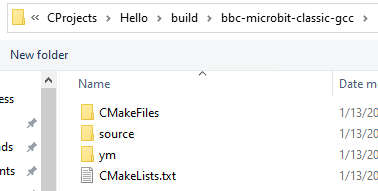
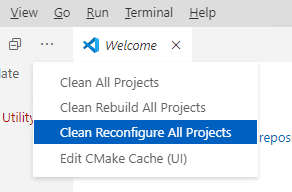
At this point VS Code might hang with a message “Configuring project: Saving open files “. If so simply restart VS Code and open the folder and select the Cmake extension and use the menu option Clean Reconfigure All Projects. This will write all the Cmake and build files needed to the build/bbc-microbit-classic-gcc directory:
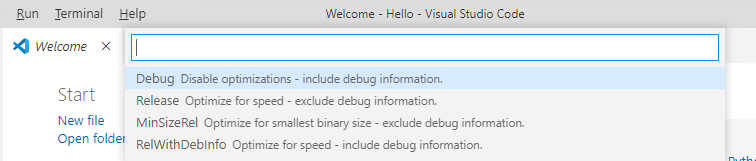
Finally all that remains is to build the project. If you try to build the debug target you will encounter a fatal error – this could be corrected in the future. The simplest solution is to select the release build by clicking on Cmake:(Debug) in the status bar:
and then select Release build from the drop-down list:
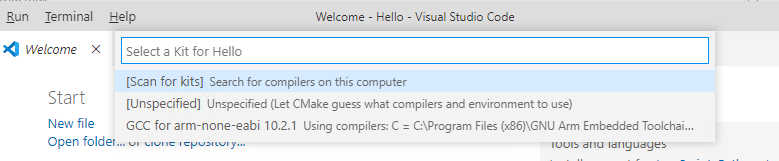
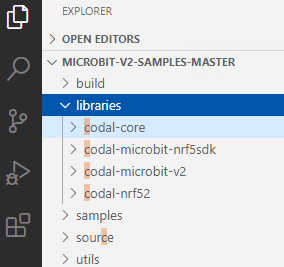
Now when you do a clean rebuild you will see lots of warning messages, but no fatal errors. You could spend time fixing them, but the effort doesn’t seem particularly worthwhile. You will find the built project in HelloWorld\build\source and the files you are interested in are build\source\HelloWorld.hex and build\source\HelloWorld-combined.hex. The first hex file is in Intel format and you will need it to create a universal hex file for V1 and V2 micro:bits. The HelloWorld-combined.hex is what you copy to the micro:bit to run the program. When you copy the file to a micro:bit connected via USB you will see Hello World scroll by on the display. If you can’t find the hex files called “HelloWorld” but only “MicroBitV1Template” hex files, you haven’t changed the project name as described earlier. The files should still work but they have inappropriate names. Hello World For Micro:bit V2Getting started with the V2 C/C++ environment is simpler than for the V1 as, despite having Yotta compatibility built-in, it is Cmake-based. All you have to do is navigate to: https://github.com/lancaster-university/microbit-v2-samples This is a demo project and it doesn’t contain all of the libraries needed to build it. However, if you download the project as a zip file and unzip it to a suitable directory you can load it into VS Code. In this case the Cmake file is in the root so the project should configure itself correctly. You will, however, be asked to select a “kit”. Essentially a kit is a compiler collection that can be used to build the project. If you have installed GCC you should see it in the list – if you don’t see it then use the Scan for kits option. If you still don’t see it, check that it is installed and on the path.
The project configuration runs the CmakeLists.txt file in the root and this uses git to download the missing libraries. For this to work, you have to have Git – not GitHub – installed. If you don’t you can download and copy the libraries manually. You need to download: https://github.com/lancaster-university/codal-microbit-v2 https://github.com/lancaster-university/codal-core https://github.com/lancaster-university/codal-nrf52 https://github.com/microbit-foundation/codal-microbit-nrf5sdk Al As an alternative you can download a zip of: https://github.com/I-Programmer-info/MicroBitV2 This is a slightly modified complete template that doesn’t need you to install Git. All you have to do is download it and unzip MicroBitV2Template to a project folder of your choice. You can either rename the file or copy it and rename it. In this case simply copy and rename to HelloWorld. When you load it into VS Code, the project will be configured, you have to specify a kit, and you can do a full clean build of all projects. No matter which project you download, the result should be a.hex file stored in the root. This can be downloaded to the micro:bit V2 when you will see HelloWorld scroll across the screen. To summarize:
If anything doesn’t work try a clean reconfigure followed by a clean rebuild. In the case of the microbit-v2-samples project, if it doesn’t work the chances are you don’t have Git installed and the libraries are not being downloaded. If you want to explore the code in the sample directory then do so and then delete the directory and do a clean configure followed by a clean rebuild. It is possible for the sample programs to interact with the program you are developing so it is better to get rid of them once you no longer need them. |
|||||
| Last Updated ( Monday, 05 September 2022 ) |