|
Page 1 of 3 Fills can be so much more than just a color. In this extract from Ian Elliot's book on JavaScript Graphics we look at how to use gradient and pattern fills.
Now available as a paperback or ebook from Amazon.
JavaScript Bitmap Graphics
With Canvas
Contents
- JavaScript Graphics
- Getting Started With Canvas
- Drawing Paths
Extract: Basic Paths
Extract: SVG Paths
Extract: Bezier Curves
- Stroke and Fill
Extract: Stroke Properties
Extract: Fill and Holes
Extract: Gradient & Pattern Fills
- Transformations
Extract: Transformations
Extract: Custom Coordinates
Extract Graphics State
- Text
Extract: Text, Typography & SVG
Extract: Unicode
- Clipping, Compositing and Effects
Extract: Clipping & Basic Compositing
- Generating Bitmaps
Extract: Introduction To Bitmaps
Extract : Animation
- WebWorkers & OffscreenCanvas
Extract: Web Workers
Extract: OffscreenCanvas
- Bit Manipulation In JavaScript
Extract: Bit Manipulation
- Typed Arrays
Extract: Typed Arrays
- Files, blobs, URLs & Fetch
Extract: Blobs & Files
Extract: Read/Writing Local Files
Extract: Fetch API **NEW!
- Image Processing
Extract: ImageData
Extract:The Filter API
- 3D WebGL
Extract: WebGL 3D
- 2D WebGL
Extract: WebGL Convolutions
<ASIN:B07XJQDS4Z>
<ASIN:1871962579>
<ASIN:1871962560>
In Chapter But Not In This Extract
- Color
- Alpha
- Stroke and Fill Color
- Stroke Properties
- Antialiasing
- Fill, Stroke and the Painter’s Algorithm
- Holes and Fill
Gradient Fills
As well as solid colors you can also define fills that are gradients between a range of colors in both linear and radial configurations. Although these are described here as fills they can be applied to fillStyle or strokeStyle.
A linear gradient is created using:
var grad=ctx.createLinearGradient(x1,y1,x2,y2);
where x1,y1 and x2,y2 are the start and end points of the gradient line. The gradient line gives the angle that the gradient is at and the distance over which the colors change. To specify the actual colors involved you need to set any number of color stops:
grad.addColorStop(p,color);
where color specifies the color and p the proportion along the gradient line that the color is applied, i.e. 0 is the starting point, 1 is the end point and 0.5 is the mid point.
For example:
var gradient = ctx.createLinearGradient(0, 0, 400, 0);
gradient.addColorStop(0, 'green');
gradient.addColorStop(1, 'red');
defines a gradient starting at 0,0 and ending at 400,0. The color at 0,0 is green and at 400,0 is red. Notice that the gradient is defined relative to the global co-ordinate system and not relative to any path that you might apply it to. As a demonstration of this consider drawing a set of rectangles each shifted in the x direction:
var path1 = new Path2D();
path1.rect(0, 0, 400, 100);
path1.rect(100, 110, 400, 100);
path1.rect(200, 220, 400, 100);
path1.rect(300, 330, 400, 100);
path1.rect(400, 440, 400, 100);
var gradient = ctx.createLinearGradient(0, 0, 400, 0);
gradient.addColorStop(0, 'green');
gradient.addColorStop(1, 'red');
ctx.fillStyle = gradient;
ctx.fill(path1);
Notice that only the first rectangle is filled with the complete gradient. The final rectangle is just red because it is beyond the gradient’s end point.
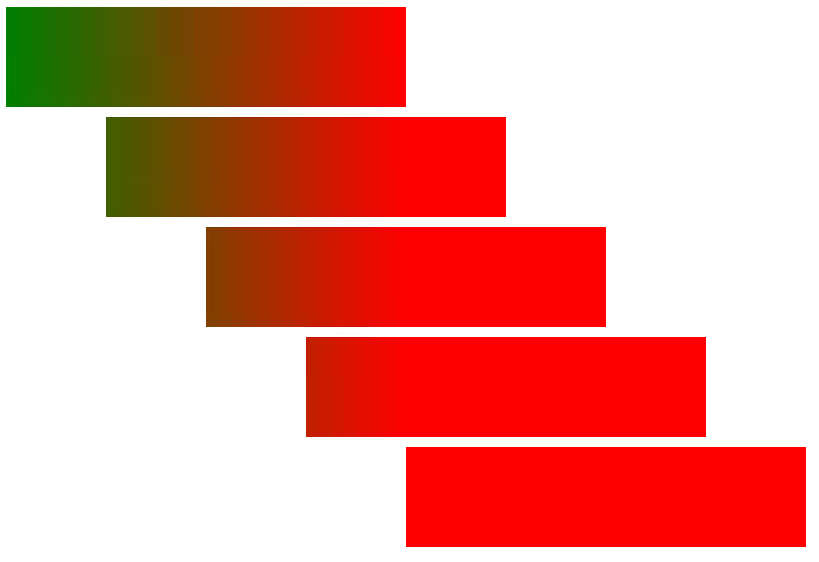 You can think of this as defining a gradient across the entire canvas and whatever you fill gets the portion of the gradient at its location. You can think of this as defining a gradient across the entire canvas and whatever you fill gets the portion of the gradient at its location.
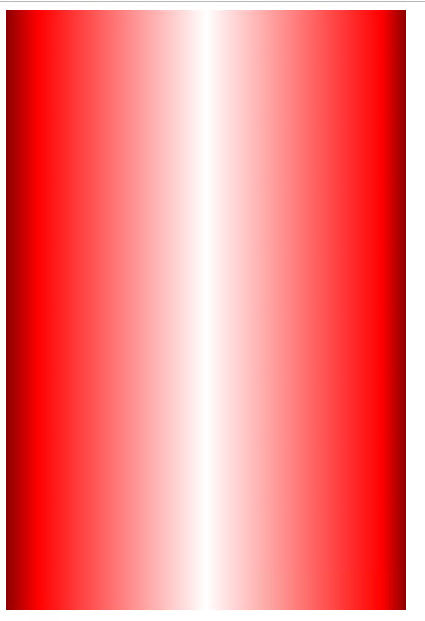
Setting multiple color stop points makes some special effects easier. For example:
var path1 = new Path2D();
path1.rect(0, 0, 400, 100);
var gradient = ctx.createLinearGradient(0, 0, 400, 0);
gradient.addColorStop(0, 'darkred');
gradient.addColorStop(0.08, 'red');
gradient.addColorStop(0.5, 'white');
gradient.addColorStop(0.92, 'red');
gradient.addColorStop(1, 'darkred');
ctx.fillStyle = gradient;
ctx.fill(path1);
creates the illusion of a curved surface with light coming from the front:
Notice that you can increase the rate at which a color falls off by adding more color stop points. For example to make the white area in the middle of the rectangle wider all you have to do is use two white color stops:
gradient.addColorStop(0, 'darkred');
gradient.addColorStop(0.08, 'red');
gradient.addColorStop(0.4, 'white');
gradient.addColorStop(0.6, 'white');
gradient.addColorStop(0.92, 'red');
gradient.addColorStop(1, 'darkred');

|