| Getting Started With Firefox OS And Geeksphone Keon |
| Written by Ian Elliot | ||||
| Monday, 13 May 2013 | ||||
Page 2 of 3
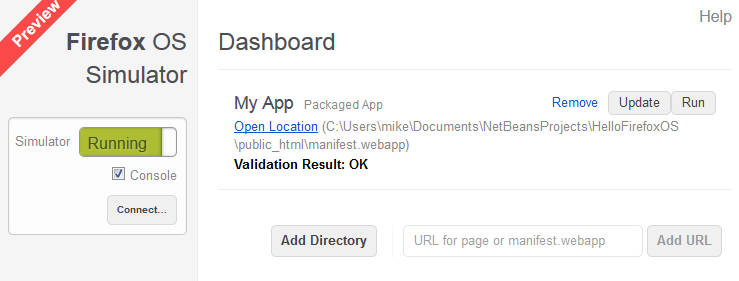
Running Your AppSwitch to the Dashboard and use the Add Directory button to enter the path to the manifest. After this you can start the simulator if you need to and click Run to download the app to the simulator and run it.
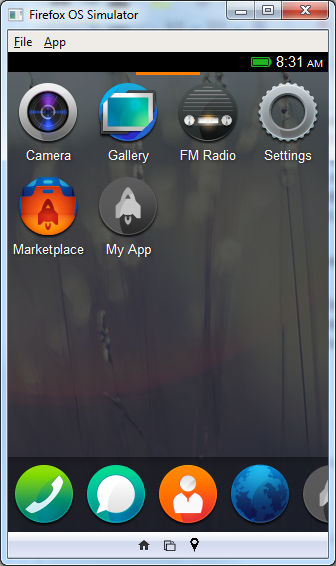
Notice that the Dashboard will show you any errors in the manifest. If you have a look at the home page in the simulator you will find a new default app icon with the caption MyApp and the default icon.
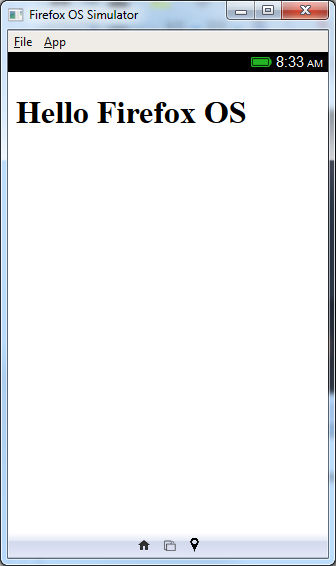
Clicking on the icon runs the app or if it is already running displays it.
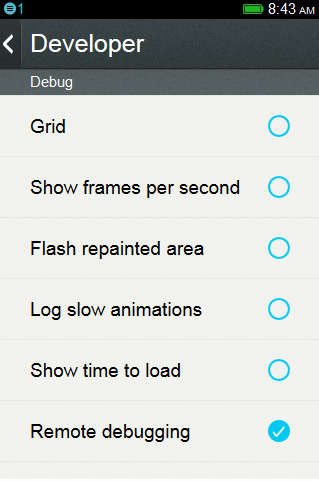
It isn't much of an app but it demonstrates how to get the app into the simulator and how to test it. If you make a change to the app and want to refresh the installation all you have to do is press the Update button on the Dashboard or use the App, Refresh menu option in the simulator. Installing Apps To The GeeksphoneNow we come to a slightly more difficult step - running the app on a real phone. Considering that the stated reason for the Geeksphone Keon to exist is to allow developers to create apps finding out how to set it up seems paradoxically difficult. Of course this might change in the next few weeks as documentation catches up. To push an app to the phone you have to set up both ends. At the phone end all you have to do is set Remote Debugging on in the Developer menu. Finding the Developer menu is a matter of starting the Setting app running and then selecting Device Information, More Information and finally Developer. At this point you can select Remote Debugging:
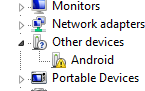
USB DriverThe next step is more difficult - mainly due to having to find and configure USB drivers for the Phone. As a shortcut Mozilla have opted to use the Android Debug Bridge (adb) as a method to talking to real phones. This has some sense in that the adb is already capable of connecting to a large range of existing phones and will probably be kept up-to-date as new phones are released. The simulator comes with the adb software but not the USB driver needed to communicate with the phone. Except in the case of the Max which means there is nothing more to do. WindowsFor Windows Geeksphone has taken the route of simply modifying inf file with the standard Google USB driver - the one intended for use with the Nexus range of phones. You can download the modified driver from the Geeksphone site direct ZIP link. Unzip the drivers to a suitable location and install the drivers in the usual way. That is, use the Device Manager, right click on the unknown/Android device icon and use Update Drivers.
Then Browse for the driver location, i.e. wherever you have stored the usb_driver directory and let Windows complete the installation. Depending on the version of Windows you are installing to the dialog boxes you see on the way vary. The driver isn't signed so you will most likely see warning message that the publisher can't be verified. Simply ignore and click the Install option. For Windows 8 installing unsigned drivers is much more difficult. You have to restart the machine using Settings in the charms menu, then select the Power icon, select General, and click Restart now in the Advanced startup section. Next select Troubleshoot, Advanced options, Startup settings and finally click Restart. , You can then select Disable Driver Signature Enforcement and when the machine has rebooted you can install the unsigned driver. The next time the machine restarts it enables the Driver Signature Enforcement option.
LinuxIf you are running the simulator under Linux then you need to consult “Setting up a Device for Development” (Steps 3.a and 3.b) in the Android documentation. You task is identical to getting adt to work with a standard Android device. The only difference is that Geeksphone's idVendor attribute is 05c6 and the extra line in the configuration file should be:
(all on one line of course). Finally change the permissions on the file to:
When you have made the changes reboot the system and it should all work. Note there are problems with 64-bit Ubuntu because it doesn't have the 32 bit software installed. You need to also do: |
||||
| Last Updated ( Friday, 21 June 2013 ) |