| Getting started with Flash development |
| Written by David Conrad | |||||
| Tuesday, 23 November 2010 | |||||
Page 2 of 4
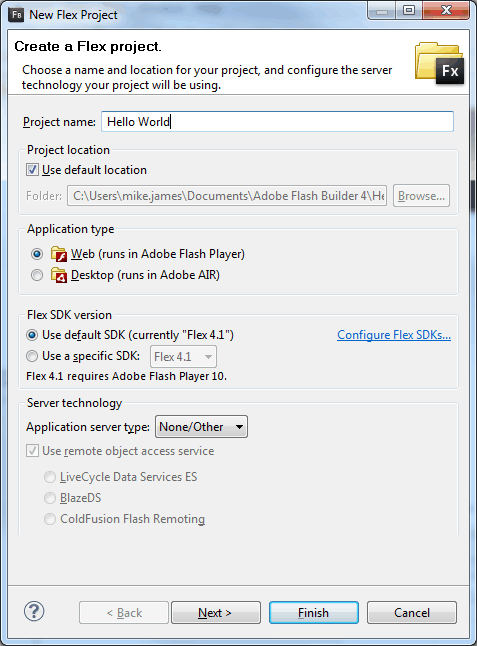
While you are creating your first project you should look at some of the alternative types on offer - you should be able to relate them to the sort of thing Visual Studio or any IDE creates. The New Project Wizard lets you target either the web, i.e. Flash Player, or the desktop, i.e. AIR. You might as well target the web in this first project and leave everything else at the default values.
Select your project type
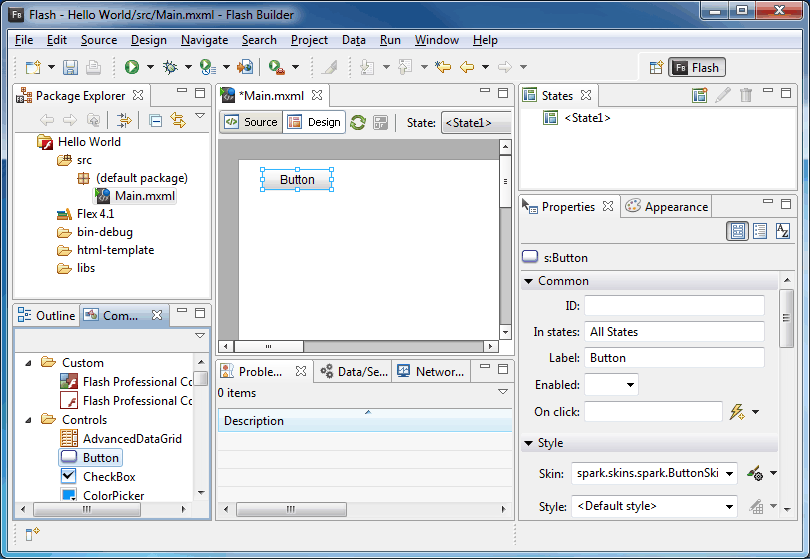
When the new project Wizard has finished you can see the directory structure and the files it has created for you. The most important is the main.mxml file. As already mentioned MXML is the Flash equivalent of XAML. While MXML is often described as a markup language its better described as an object instantiation language - again just like XAML. The designer takes MXML and coverts it into ActionScript statements that create objects described by the MXML and sets their properties accordingly. The advantage of this approach is that the MXML code is shorter than the corresponding ActionScript and it can be generated by the designer. To see this in action select the file main.mxml and select the Design tab. The designer is a full drag-and-drop editor and you can see a range of controls and other components listed in the Components window - bottom left. If you now drag-and-drop a button onto the design area you will be able to customise it by positioning it, resizing it and changing any of its properties in the Properties window - bottom right. If you have used any drag-and-drop designer then you will have no problems using this one.
The designer
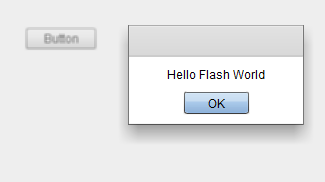
If you switch back to the Source tab you should find that the following MXML has been generated: <?xml version="1.0" encoding="utf-8"?> There are two object specified by the MXML - the Application and its single child object - a button. If you are familiar with HTML or any XML markup language then this should seem easy to follow. However it is worth being clear that the MXML is an object creation language and when it is compiled it is exactly equivalent to ActionScript creation and customisation of those objects. If you don't want to use MXML you don't have to and this is an exact parallel with XAML. Our next task is to add some code. In most cases the code that you add is going to be in a separate ActionScript file but you can add "inline code" or "code blocks" within the MXML. The designer will automatically generate a click handler for you. Simply right-click on the button and select Generate Click Handler. This modifies the MXML button tag to read: <s:Button x="24" y="10" which specifies a click handler in much the same way as in HTML or XAML. An inline code stub has also been added: <fx:Script> Clearly inline code isn't the way to build large applications but it is also supported in HTML and in XAML. To turn this into our Hello World program we can simply make use of the Alert object - which is similar to the Alert function in JavaScript: <fx:Script> If you right-click and select Content Assist while typing you will be offered choices that you can select to complete the command - this is equivalent to Intellisense prompting. Using Content Assist to add code has the advantage that it automatically adds, or checks that you have, the necessary import statements to use the class that you have just referenced. Now we can run the program and see how it works. Eclipse has a complicated or sophisticated depending on you view point, system of debug/run profiles that, once you get the hang of using them can save a lot of time. In this case the easiest way to run the program is to simply Run or Debug Main from the Run menu or click on the "bug" icon in the toolbar. In a few moments a browser should open and display the button and if you click the usual message. If there are any errors they will be flagged in the Problems tab at the bottom of the screen and you can fix them and try again.
A first program - working <ASIN:0596526954> <ASIN:0321591925> |
|||||
| Last Updated ( Tuesday, 23 November 2010 ) |