| RenderTargetBitmap - Visual vector to bitmap |
| Written by Administrator | ||||
| Tuesday, 12 January 2010 | ||||
Page 2 of 3
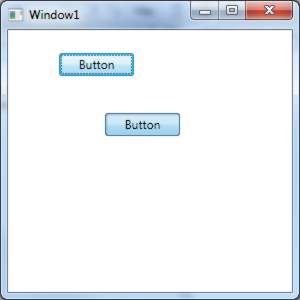
If you run this program and click the button then you will see an image of the button appear in the image control.
The button's image will be positioned relative to the top left-hand corner of the bitmap in the same way the real button is positioned in the Grid. If you move the button around the Grid you will see that its image also moves in the bitmap to the same position. It is, however, all too easy to move the button to a location that puts it outside of the bitmap's area and in this case it just doesn't appear. This is such a common occurrence that some programmers believe that you can't render a control that is part of an active layout - you can but you need to make sure that it is positioned so that it is located within the bitmap. What is used to position the button within the bitmap? If you are familiar with Windows Forms programming you might be expecting to encounter top and left properties which locate the button but this is not how WPF works. It uses a layout system that attempts to find the best arrangement of the UIElements to suite the space available. The only layout panel that allows you to specify an exact size and location for a UIElement is the Canvas and to use this method of fixing the size and position the UIElement in question has to be a child of the Canvas and hence part of its layout tree. When a UIElement is rendered by RenderTargetBitmap the layout tree is ignored, as is the parent of the UIElement that is being rendered. In this case the only possible method of locating and sizing a UIElement is to use the standard layout and rendering system. This means that the size of the UIElement is set by the ActualSize property and the location is set by the Margin property in conjunction with the AlignHorizontal and AlignVertical properties. All this will become clear when we move on to rendering a UIElement that isn't part of the render tree. You can set the size and position of a control that is being displayed on the form as a child of any layout panel but notice that any changes you make will, of course, alter the position of the control within the form. For example, if you change the position of the button to the very top left before you render it, all you need to do is set the Margin to zero. Most UIElement objects can't be changed unless you use a BeginInit and EndInit call to unlock their properties: button1.BeginInit(); With a Margin of zero the button now has its top left-hand corner at 0,0 but first we need to call the button's Arrange and UpdateLayout methods so that the layout system can compute its location: button1.Arrange( The size of the Rect that is used in the method call doesn't matter particularly as long as it is contains the location of the button. Now we can render the button in the usual way and display it: RTbmap.Render(button1); If you try this out you should find that the image of the button displays in the top left-hand corner of the image control - but the real button moves to the top left-hand corner or the Grid control. Similarly you can move the button to (x,y) using: button1.BeginInit(); You can also change the size of the button but in this case you need to add a call to the Measure method to update the size information: button1.BeginInit(); Now the button moves to 50,75 and is resized to be 150 wide by 25 high. Of course this moves the real button as well as its rendered image in the bitmap. In general you can use this sort of method to take representations of the screen as bitmaps for further processing. Rendering general UIElement objectsFor controls that are part of the render tree of a display panel rendering to a RenderTargetBitmap is easy apart from the problem of positioning and resizing. If you create a UIElement object of any sort that isn't part of a render tree then you need to take responsibility for the measuring and layout yourself. Without doing this the Visual object will fail to render because it doesn't contain enough information to do so. As an example, consider rendering a button created programmatically: Button b1 = new Button(); Once again any modifications to the button have to be between BeginInit and EndInit but in this case we have to initialise a lot more properties - size 50 by 100, position (40,60) and alignment. Of course we might want to initialise other properties to modify how the button looks. Before we can render the button we need to set its render size using Measure, again the Size passed to the method simply has to be bigger than the Visual being measured (otherwise the Visual tries to fit into the smaller space). We also need to call the Arrange method to complete the layout and Update to finish the setup. After this we can Render the button and see the result. 
<ASIN:1430210842> <ASIN:1590598849> <ASIN:0672328917> <ASIN:1933988223> |
||||
| Last Updated ( Friday, 19 March 2010 ) |