| Scrollbars, Trackbars and fonts |
Page 3 of 3
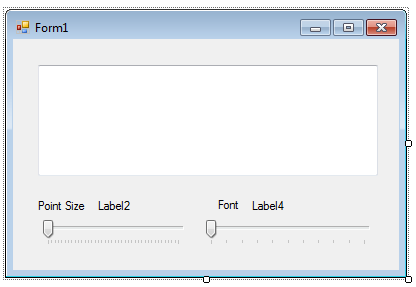
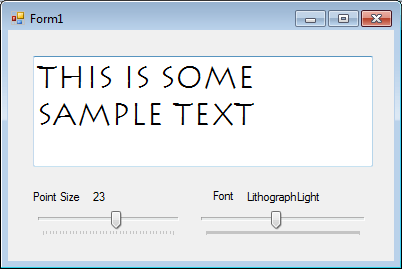
Project - Font-eratorThis program is a simple utility that allows the user to examine what any piece of text looks like in any font and any point size. Although there are many ways in which this could be achieved the opportunity to use scroll bars to control both point size and font type is appropriate given the main topic or this article! However to make things look a little more natural we can use a control that is closely related to the ScrollBar - the TrackBar. This has most of the same properties, methods and events as the ScrollBar but it looks more like a slider that can be used to control something general. The use of a Trackbar to control point size isn't particularly novel but controlling font type via a Trackbar is a bit more unusual. Starting at the beginning. You need a new form complete with four labels, one large text box and two horizontal TrackBars.
The first task is to set the Trackbars to produce an appropriate range of values. TrackBar1, which controls the point size, can be simply set to a reasonable range e.g. 1 to 40. The biggest problem is what to set the scroll bar that controls the font type to? The solution is to use the FontFamilies object which lists all of the types of Font you can use. This has a Families property which returns a list of all the types and a Length property that tells you the number of types. To initialise the TrackBars the form load event handler is used - Private Sub Form1_Load( Notice that we set the TrackBars to reasonable values and then set the TextBox to the current font. To do this we have to create a Font object of the correct type - i.e. Font Family and size. If the user changes either of the TrackBar positions we have to create new font object according to the settings. So we need a single event handler for both TrackBars - as it doesn't matter which TrackBar caused the event we have to do the same set of actions: Private Sub TrackBar_Scroll( This routine is quite complicated. To set it to serve both events use the Properties window and select the name of the routine in the event tab for each of the events. First it creates a new FontFamily object which corresponds to the current setting of TrackBar2. Now we come to a complication. Not all font types support all styles and we are by default going to display only Regular style - i.e.not italic, bold etc. We could add a slider for style type but in this case to be simple we check that the font supports Regular. If it does then the text is displayed using it. If it doesn't then nothing happens. Not idea but easy to implement. As long as the FontFamily support Regular style (most do) we next create the Font object at the correct size and set the TextBox Font property to use it. Finally we set the labels to the font size and the font name. Once you have finished typing in the code you can try this font examiner out. It isn't wonderfully useful but it does demonstrate how TrackBars can be used in slightly more creative ways.
Notice that you have also taken a first look at the way that fonts work. If you want to take this application a little further you might like to add bold and italic as possible additional selections. Of course the range of fonts that you see will depend on what you actually have installed on your machine. To access the complete project, once you have registered, click on CodeBin.
This is the sixth chapter of the ebook Master Visual Basic 2010. See also:Chapter 2 - Mastering VB Properties Chapter 3 - Mastering VB Events Chapter 4 - Mastering VB Controls Chapter 5 - Graphics and Animation in Visual Basic
If you would like to be informed about new articles on I Programmer you can either follow us on Twitter, on Facebook or you can subscribe to our weekly newsletter. <ASIN:1430226021 > <ASIN:0132152134 > |