| Kinect SDK 1 - The Player Index |
Page 3 of 3
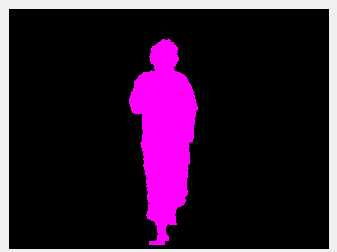
Color mappingClearly if you want to visualize the user index data it has to be processed to a more distinct set of colors corresponding to 0 to 7, The sample program that comes with the SDK uses a hand coded color mapping for each of the 7 colors. A much simpler solution is to map each of the three bits to the three colours R G and B. That is if bit 1 is set then set R to 0xFF i.e. full Red. if bit 2 is set then set G to 0xFF i.e. full green and finally if bit 3 is set then set B to 0xFF i.e. full blue. If any combination of the bits is set then you get a mixture of colors i.e. user 7 gives white. To implement this we need a new array: int[] playercoded = new and the for loop now becomes: for (int i = 0; i < depth.Length; i++) And the line to display the user index is changed to: pictureBox2.Image = IntToBitmap( and now you should see player 1 appear as a red silhouette.
WPFIf you are working with WPF then the only change is that the IntToBitmap conversion routine which now has to use a BitmapSource object instead: BitmapSource IntToBitmap(int[] array, The only other change needed is to use Image controls rather than PictureBox controls and: image1.Source = IntToBitmap(depth, The program now works in exactly the same way as the Windows Forms version. An alignment problemNow we are ready to use the player index as a mask to pick out the player in the video stream. However there is an interesting problem that we have to solve first. If you simply try to use the player index or the depth field as a mask on the video stream you will discover that they are slightly out of alignment. If you explore this you will also discover that that the amount that they are out of alignment varies according to the distance the user is from the Kinect. The reason for this is that the video and depth cameras are in slightly different locations and therefore have a different view point. The pixels in the depth and video image don't match up in a simple way. There is a solution but this is explained in the next chapter.
You can download the code for both the Windows Forms version and the WPF version in a single ZIP file from the CodeBin (note you have to register first). Practical Windows Kinect in C#
|