| Raspberry Pi CM5 IoT In C - Getting Started With PIO |
| Written by Harry Fairhead | |||||
| Wednesday, 04 June 2025 | |||||
Page 3 of 4
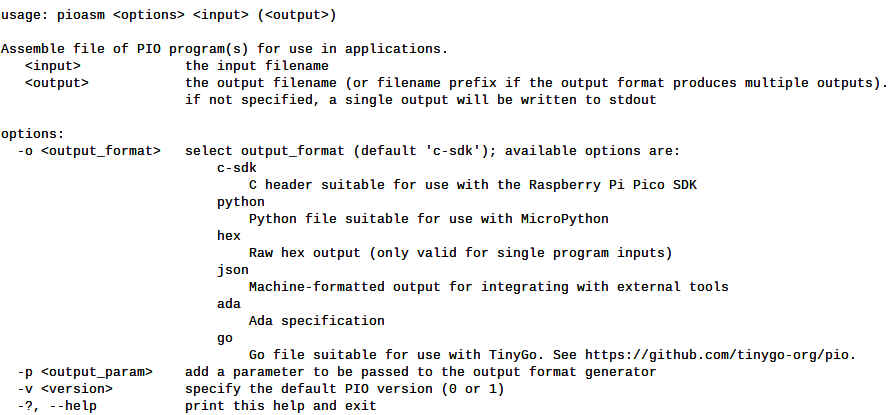
The PIO AssemblerThe program is simple, but now we have to convert it into machine code by either hand-assembling it, which is possible but tedious, or passing it through an assembler. The Pico SDK has an assembler included, but this is not available as part of the Pi’s software. The simplest solution is to install the Pico SDK to your Windows, Mac or Linux development machine. You can then navigate to the ~/.pico-sdk/tools/2.1.0/pioasm directory and copy pioasm or pioasm.exe file to a development directory. You can also find copies of pioasm and pioasm.exe in the Gpio5/PIOAsm directory on GitHub. To make use of the assembler you need to copy it to a suitable directory and the .vscode directory is a reasonable choice and is the folder used to host the assembler in the rest of this chapter.
The defaults suit our purpose in generating a header file for use in a C program. For example: pioasm sqwave.pio sqwave.pio.h creates a header that can be included in a sqwave.c program to supply the assembled program in a usable form. If you get a permissions error when you try to run pioasm you need to set its execute bit: chmod +x .vscode/pioasm To make it easier to create the header file from the PIO file we can create a VS Code task: {
"tasks": [
{
"label":"Build PIO header",
"type":"process",
"command":".vscode/pioasm",
"args":[
"${fileDirname}/${fileBasenameNoExtension}.pio",
"${fileDirname}/${fileBasenameNoExtension}.pio.h"
]
},
Add these lines to the task.json file and you can associate a shortcut key press to run the task more easily. Notice that it assumes that pioasm is stored in .vscode within the project directory and is executable. The C ProgramThe sqwave.pio program contains the PIO program in PIO language. The sqwave.pio.h file contains the assembled program and some helper functions. Now all we need is a C program to make use of the assembler to load it and set the state machine running. We have to include the header file that the assembler generated: #include "sqwave.pio.h" This adds the definition of the machine code to your program: static const uint16_t squarewave_program_instructions[] = {
// .wrap_target
0xe081, // 0: set pindirs, 1
0xe001, // 1: set pins, 1
0xe000, // 2: set pins, 0
You could write some code to load the contents of the array into a PIO, but the header file also creates a struct that can be passed to an SDK function that will load the code for you: static const struct pio_program squarewave_program = {
To load the code all we have to do is use the standard function: uint offset = pio_add_program(pio0, &squarewave_program); Now we have the code loaded into pio0, the next job is to pick one of the four possible state machines to execute it and it is better to let the SDK select the first free machine: uint sm = pio_claim_unused_sm(pio0, true); The final parameter will cause the program to fail if there are no state machines available. Set the final parameter to false and the return value is negative rather than a state machine index in case of error. |
|||||
| Last Updated ( Wednesday, 04 June 2025 ) |