| Building a Joomla component using Eclipse for PHP |
| Written by Ian Elliot | |||||
| Monday, 28 September 2009 | |||||
Page 2 of 4
Creating the XML fileThe first task is to create the XML file which describes the component project. You can find details of how to do this in lots of other places and the documentation is at Joomla docs. 
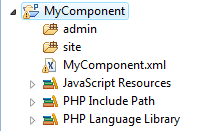
First create a directory to act at the root of the project - you can call it whatever you like as its name doesn't find its way into the installation - but it is usual to give it the name of the component. In this case mycomponent. Next use Eclipse to create a project based on this "existing" project - once again you can give the project any name you like but it is reasonable to use the component's name.
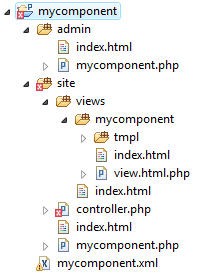
If you already know about standard naming conventions for components you might be tempted to start using your knowledge - but don't. Don't start any of the file names with com_ as this is added where necessary during installation. Also stick to lowercase in the file and folder names - you don't always have to in prinicple but it makes life easier.. Using Eclipse you can now create the XML file which describes the component and its folders and files. Create an XML file and give it the same name as the component mycomponent in this example. The files starts with some very obvious basic information which is just there to help other programmers: <?xml version="1.0" encoding="utf-8"?> Replace the text between the tags with reasonable entries. Next we have version number and a description of the component: <version>1.01</version> The next part of the XML file describes the folders structure and the files that will be copied when the component is installed. There are two top level folders site and administration corresponding to the front and back end behaviour of the component. You can modify the structure of the folders and files but there are big advantages to sticking with Joomlas MVC architecture and this is best revealed and worked with using the standard folder/file structure. Within the site folder the following are standard: <files folder="site">For a first attempt at a component a dummy administration implementation is just: <administration> and the entire XML file ends with: </install> Just to be clear it is worth repeating that the XML file is saved as mycomponent.XML in the root of the project i.e. at the same level as the site and admin folders. Your next task is to create each of the directories and files specified by the XML file. At the moment leave all of the files empty. The final folder and file structure should be:
Finally there are a number of files called index.html and one mycomponent.php in the admin folder. Simply create each of these with the default blank screen HTML: <html> These are basically dummy files just in case a user tries to load them directly.
<ASIN:1590598482> <ASIN:047043287X> |
|||||
| Last Updated ( Wednesday, 03 March 2010 ) |