| Building a Joomla component using Eclipse for PHP |
| Written by Ian Elliot | |||||
| Monday, 28 September 2009 | |||||
Page 4 of 4
The view and templateNow the controller display method, in this case inherited from the JController class, simply works out what view class to use based on the name of the component and the view specified. The name of the view class used is constructed by the Joomla framework and we don't have much freedom in what we call it. 
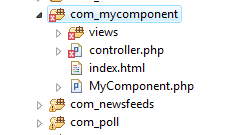
The default view class is view.html.php - the html indicating that it will render to html rather than pdf say. The controller display method uses the framework to piece together the name of the view class using the information in the URL used to load the component.. If the URL is: index.php?option=com_ mycomponent the Framework attempts to retrieve the view option and the layout options and constructs the name of the view class as the name specified in &view= and a standard prefix constructed as mycomponentView. What this means is that the name of the view class is by default: mycomponentViewmycomponent and this is what you have to create in the view.html.php file: <?php class mycomponentViewmycomponent The view class sends data to the template using the inherited assignRef method. In this case we simply pass a string variable to the template and create a new message property. More complicated data exchanges are possible but essentially we use assignRef to post data into variables within the template which the template then uses mixed in with its HTML. Finally we use the inherited view display method to load and run the template. The template i.e. default.php stored in the tmpl directory can simply display the variables it has been assigned from the view in this case message: <?php InstallationNow we are ready to try it all out. First make sure everything has been saved - close Eclipse and reopen it if you are in any doubt. Next navigate to your components top level folder and zip the admin and site folder and the xml file into a single zip with the same name as the component - mycomponent.zip in this case. To install the component log on to the Joomla site administration and select the Extensions,Install/Uninstall option. Next use the Browse button of the Upload package file to specify the Zip file and then click Upload File & install. This is where you find out if you have made any spelling mistakes or missed out any of the folders or files. The installer will tell you what is missing and you have to go back to Eclipse, rename the folders/files - use Refactor - and then remember to recreate the ZIP and try again. The most common error is to change the files and then forget to copy them into the ZIP! Once you see the Install Component Success message you can start to investigate. If you open Eclipse and refresh the directory structure F5 you will discover that there is a com_mycomponent directory in components with all of the files you have created.
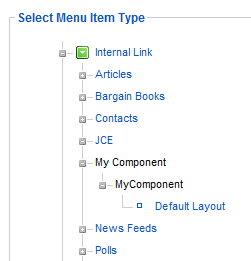
The Admin folder's contents and the xml file have also been added to administrator/components/com_mycomponent. You can now edit and debug the files using Eclipse but remember to copy any changes back to the component project directory to keep it up-to-date. To try the component out, go to the Menu Manager and add a menu item - you should see My Component as an option and you can link the menu item directly to the Default Layout of the component.
Next when you view the menu and click on the item you should see the Hello World message generated by your new component. You will also see a new My Component menu option in the Components menu of the administration site but of course this just displays the dummy php file you created. It is now time to fill out the various parts of the component's code and make it do more. Keep up the component project by copy the files from the Joomla site to the component project, remember to update the zip file and test now and again that it all still installs properly. An alternative approach is to simply keep the zip file and delete the component project. Indeed if you download the zip file from this site you can simply use it to install the component to your Joomla project. It all depends on how you want to work. Next: Read up on extending the example to use a model at the Joomla database and the administration site. http://docs.joomla.org/Components:xml_installfile
If you would like the code for this project then register and click on CodeBin.
<ASIN:1847191304>
|
|||||
| Last Updated ( Wednesday, 03 March 2010 ) |