| Disk Drive Dangers - SMART and WMI |
| Written by Mike James | |||||||
| Monday, 01 July 2024 | |||||||
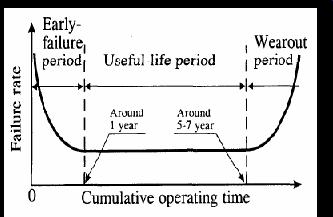
Page 1 of 6 Getting access from an application to the hardware is never easy. If you want to know how well your disk drive is performing then there is a way of accessing the SMART data - including the temperature - using WMI and .NET 8 and it is fairly easy. A USENIX study of how disk drives fail, describes a large scale study of drive failure and makes interesting reading and concludes that while many drives fail without giving any prior warning a significant number do show early warning signs as part of their SMART data. SMART or S.M.A.R.T, which stands for Self Monitoring and Reporting Technology, is a facility built into all modern disk drives that analyses their performance and notices any degradation that might indicate imminent failure.
The life-cycle of a hard drive - it is as it approaches the wearout period that SMART data can single an imminent failure. The big problem is that Windows doesn't provide easy access to the raw SMART data and this makes it difficult to monitor how a drive is “ageing”. This makes a SMART monitor an ideal project and along the way we meet the incredibly useful WMI. WMIWMI, Windows Management Interface, provides an amazing range of useful facilities that lets you find out how a PC is operating and performs system level tasks such as automatically shutting down or restarting or managing the print queue. Sadly the WMI is often ignored because it looks complicated when you first meet it and it doesn't really seem to be a “mainstream” Windows API. The introduction of .NET has made it much easier because the Framework includes WMI classes. But first a little information about raw WMI. WMI is available on machines since Windows 98. One of its main problems is that there are so many different acronyms associated with it – DMFT, WBEM, CIM and so on. These all relate to different standards committees, industry bodies and slightly different versions of the technology. The basic idea is that every device, component or facility that a PC might have, is represented by a class. For example there is a disk drive class that has methods and properties that make it suitable as a representation of a disk drive. A particular PC will have an instance of the disk drive class for each of the drives it has installed. Each instance records information about one particular drive. You can find out about, and even modify, the current state of the disk drive by accessing its WMI object and working with its properties and methods.
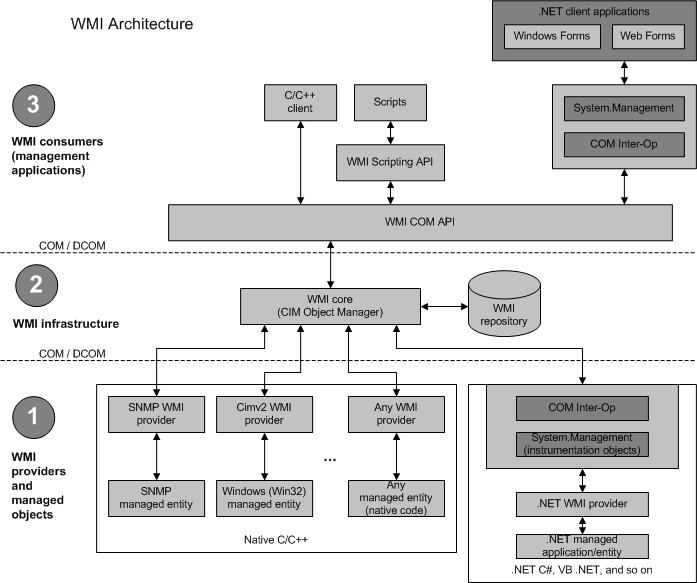
WMI Architecture - WMI is COM based but this is mostly hidden from .NET apps and Scripts that make use of it.
To help you find what you need it is worth knowing that there are five categories of classes:
The most confusing part of using the WMI when you first start is the way that it seems to be a cross between a database and a collection of objects. In fact this is the best way to think about it, i.e. as a database that returns objects in response to queries. The .NET Framework provides a set of classes that allow you to query the WMI database and work with the objects that are returned.
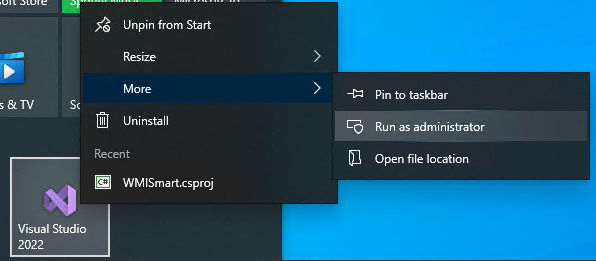
The key to using WMI from .NET is the ManagementObjectSearcher class and the best way to find out how it works is via a simple example. It is worth saying at this point that none of the following will work if the application isn't running with administrative privileges. While you are debugging this is most easily achieved by running Visual Studio as Administrator - right click and select the option from the context menu.
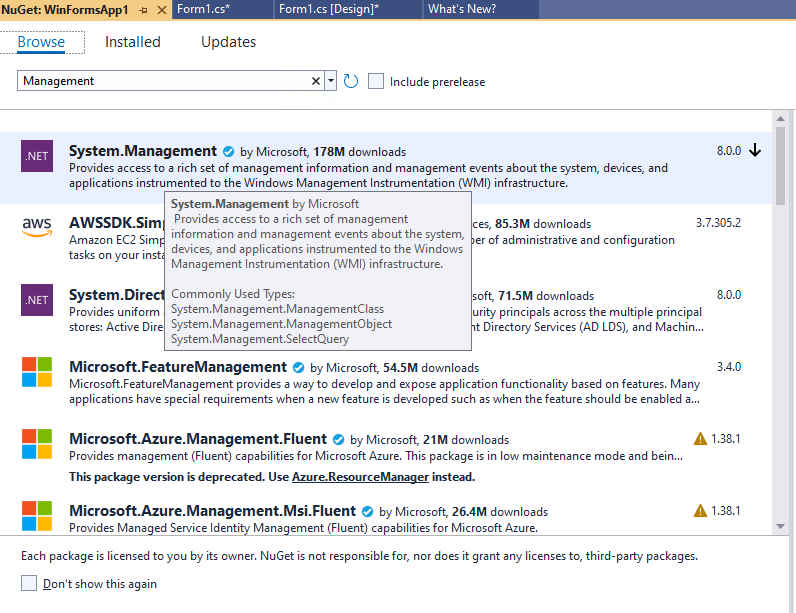
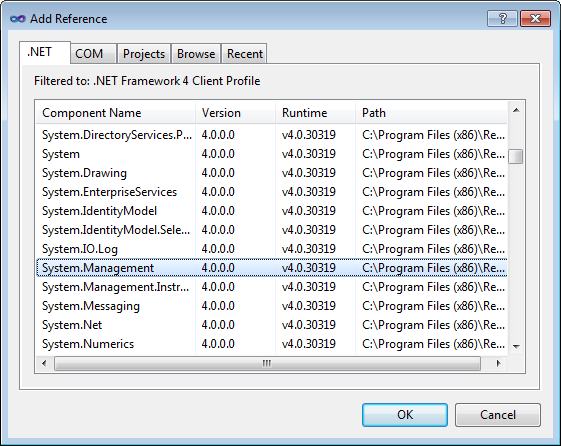
Start a new Windows .NET 8 Win Forms project in Visual Studio (running as administrator) and use Project,NuGet Packages to add System.Management to the project:
Also add: using System.Management; to the start of the program.
|
|||||||
| Last Updated ( Monday, 01 July 2024 ) |