| Android Programming In Kotlin: Activity & UI |
| Written by Mike James | ||||
| Monday, 30 December 2019 | ||||
Page 3 of 3
Next select the button in the Widgets section of the Palette by clicking on it:
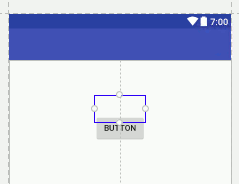
If you now place the cursor over the design area you will discover that as you move it various alignments are indicated by lines:
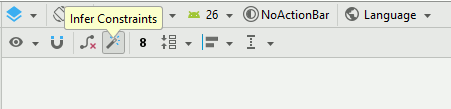
To position the button simply click and a full button, complete with the default caption Button, will appear. However, simply dropping the button on the design surface isn't quite enough. If you just do this the button will be positioned but without any positioning constraints. If you try running the program you will find that the button sometimes vanishes on the emulator or real device. The reason is that with no constraints to its positioning applied it rises to the top of the screen and is hidden behind other controls. This behavior is characteristic of the default ConstraintLayout, more of which later. For the moment we just need to apply some constraints to the button. The simplest solution is to click on the Infer constraints icon and let Android Studio work out how to position the button:
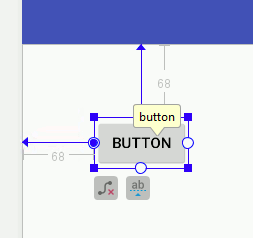
When you click this button constraints are added according to where the Button is positioned. At the moment exactly what constraints you end up applying matters less than the simple fact that there are some. In the screen dump below the button is constrained to be a fixed distance from the top and right-hand side. Notice that you can position the button and then click the Infer constraints button to set the constraints needed to keep the button in its location:
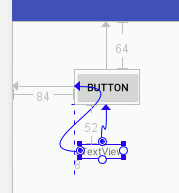
Now you have a button on the UI ready to go, let's add a TextView Widget in exactly the same way – click on its icon in the Palette, position in the Layout Editor and click to set the position. Notice that Android Studio provides positioning information to help you align components of the UI. Again you need to click the Infer constraints icon to position the TextView. The simplest thing to do is position the TextView where you want it and then click the Infer constraints icon to set the constraints needed for that position:
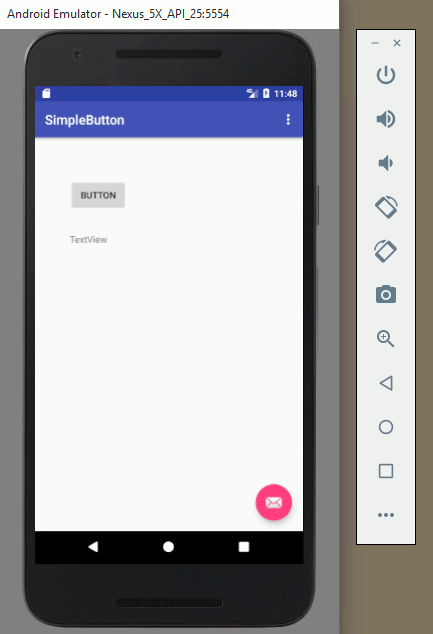
Notice that Android Studio provides positioning information to help you align components of the UI. The simplest approach to creating a layout is to place the components where you want them and then click the Infer constraints icon to apply constraints to fix their position. In practice these constraints may not be exactly what you need but it gives you a starting point. That's about it and in fact creating a complete complex UI is just more of the same, just a matter of picking components from the Palette and positioning them on the design surface. If you now run the program, by clicking the green Run icon (refer back to Chapter 1 if you don't know how to do this) you will see your new UI:
Of course it doesn't do anything, even if you can click the button. The button does click, but there is no code connected to the button click event to say what should happen, something we will deal with very soon. In the next extract we will look at how to make something happen.
In the chapter but not included in this extract:
Summary
Mike James, founder, editor and prolific contributor to I Programmer is also the author of Programmer's Guide to Kotlin and of Android Programming In Java: Starting with an App
Android Programming In Kotlin
|
||||
| Last Updated ( Monday, 30 December 2019 ) |