| Setting Up Site-To-Site OpenVPN |
| Written by Sam James | |||||
| Monday, 30 August 2021 | |||||
Page 2 of 4
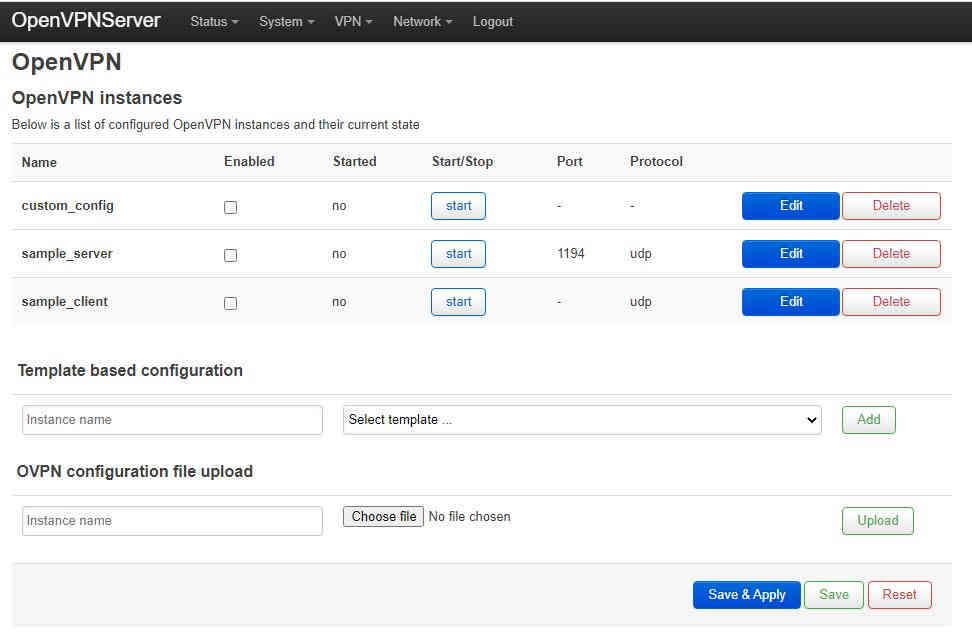
Server Client Configuration via LuCIFirst we need to start a simple server If you installed luci-app-openvpn on both routers we can use this to set up a simple server and client with the most common options already filled in. Start by logging in to the server with a web browser and select VPN→OpenVPN from the top menu. Then click the Edit button beside “sample_server”:
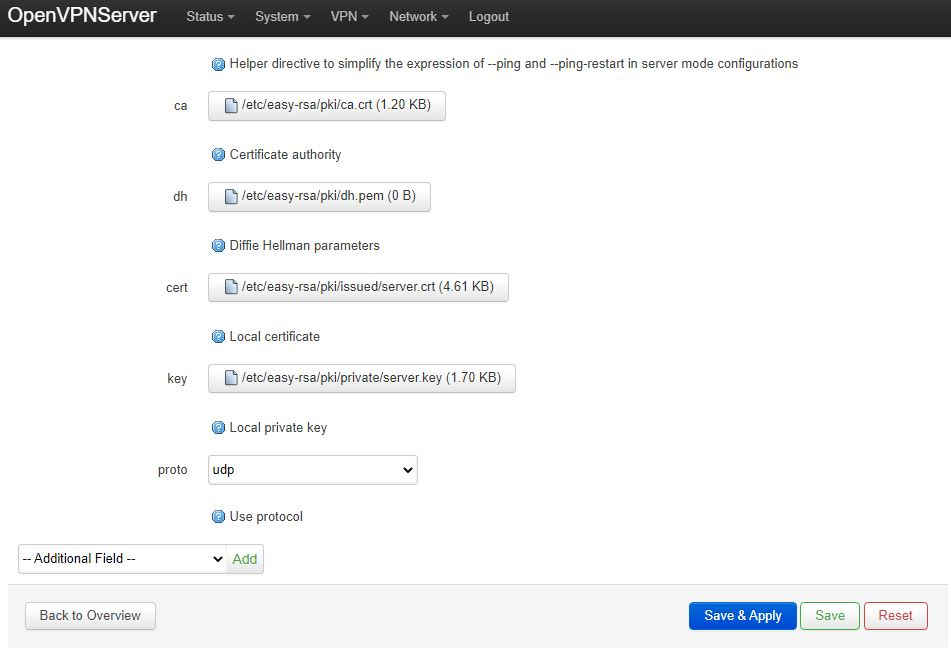
It should be a simple task to fill in the location of the certificates we just created:
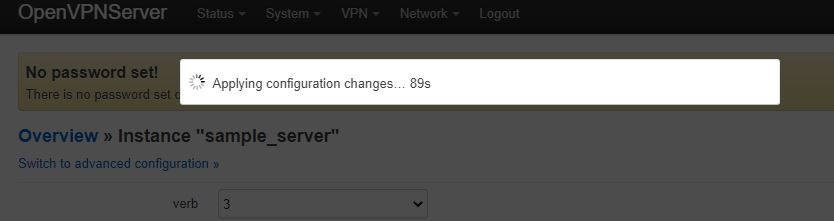
When everything is filled in correctly, click “Save & Apply” and you should get a banner informing you the changes are being configured. It is very easy to forget to apply the settings and then wonder why nothing is working:
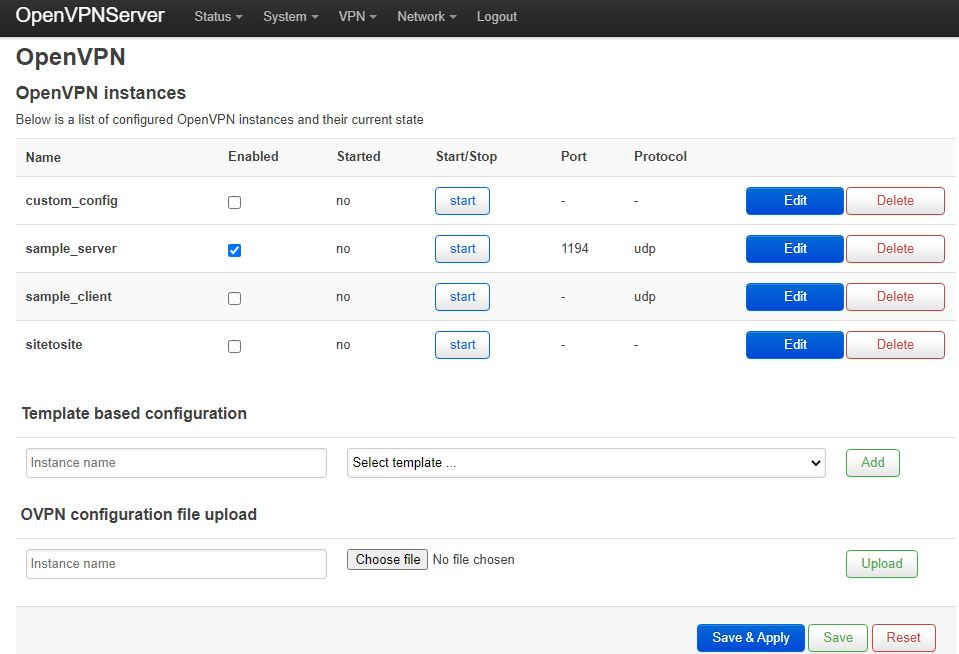
We can now check to see if this simple server is working. To start the server we have to click the enable tick box and then “Save & Apply”:
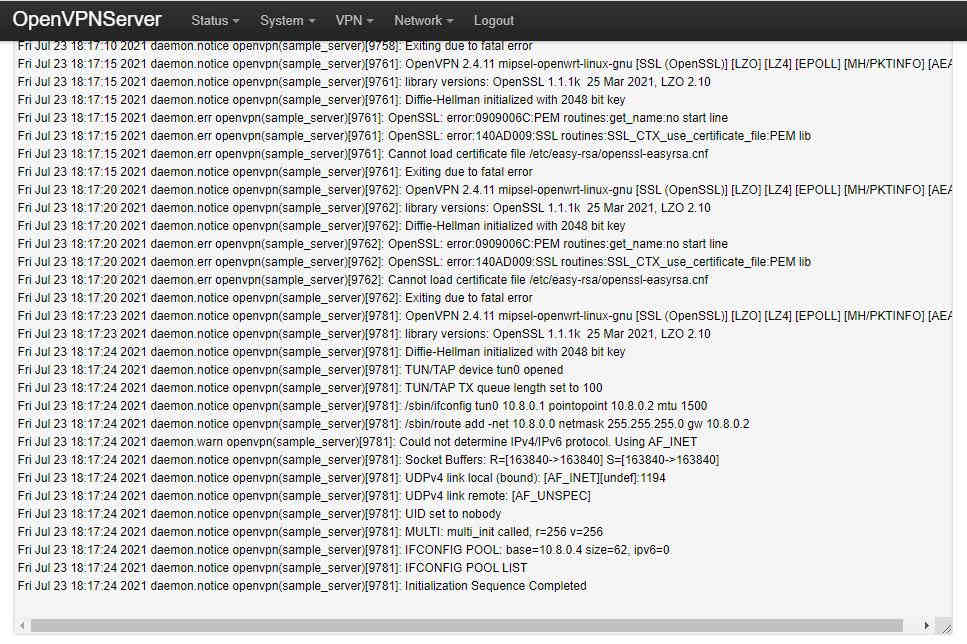
We can now check the VPN server has started correctly. Select Status→System Log from the top menu and scroll all the way to the bottom:
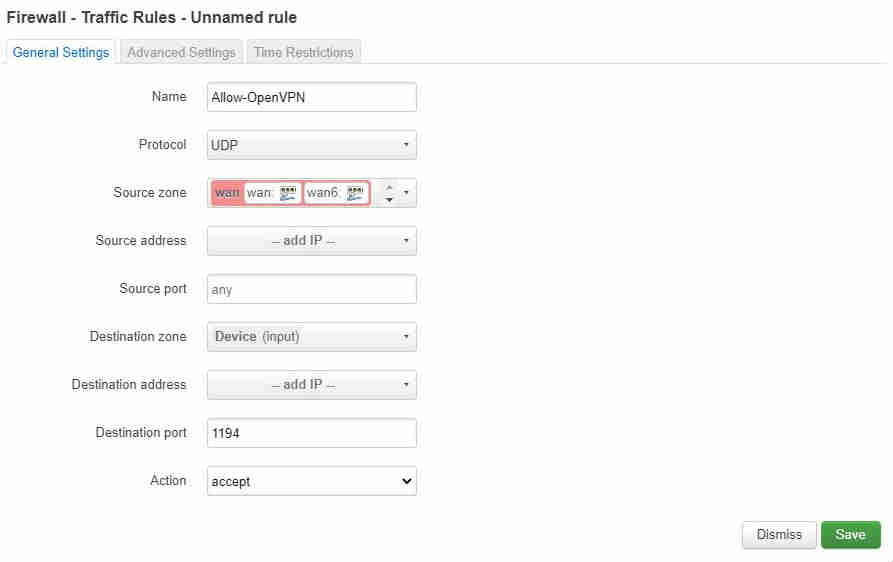
Now we have a simple server running but no clients will be able to connect as, by default, the firewall will block all incoming traffic from the WAN zone. To allow a client to connect we need to add a rule to the firewall to allow any incoming packets on the VPN port - we'll leave this as the default,1194. Select Network→Firewall from the top menu and then click onto the “Traffic Rules” tab and then click the “Add” button at the bottom of the page. Fill in name as “Allow-OpenVPN”, select only UDP packets from the Protocol drop down box then “Device (input) from the Destination zone and finally “1194” in Destination port:
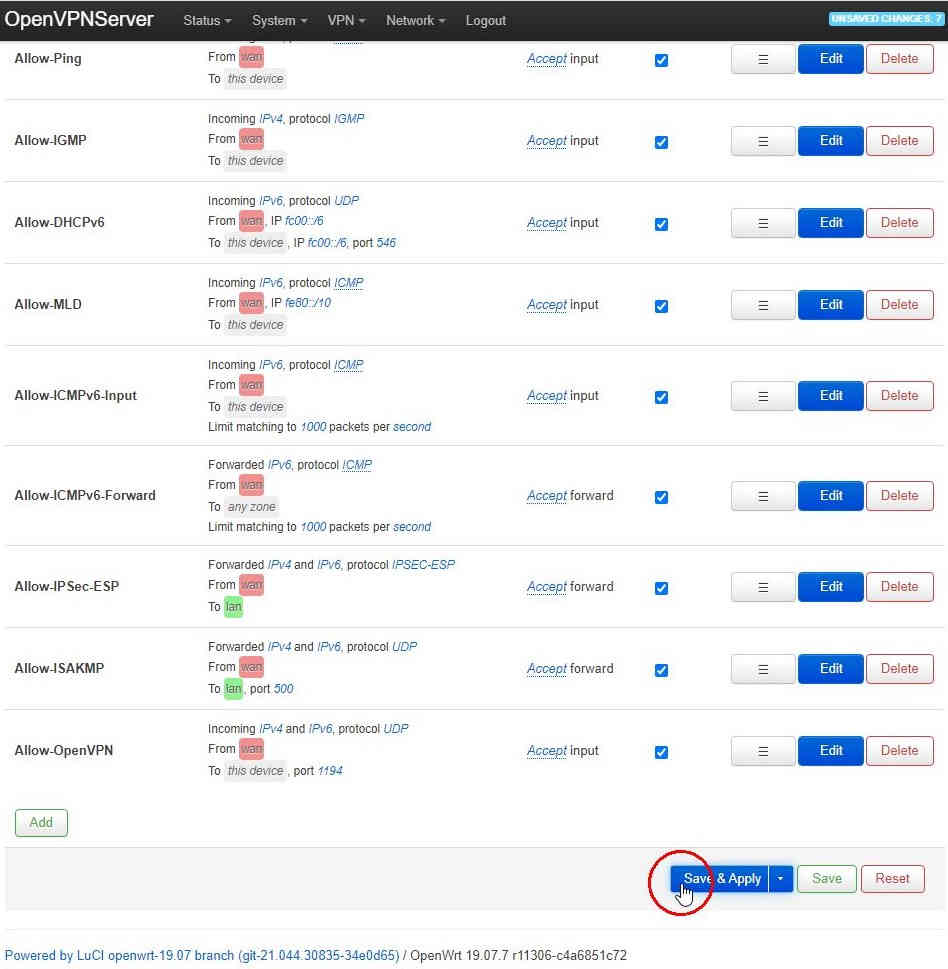
Once you click “Save” the changes are committed until you click “Save & Apply” at the bottom of the page you return to. So many problems come from forgetting to click “Save & Apply” and wondering why something isn’t working only to find you haven’t made the changes you think you have!:
Once you’ve added this rule you should find client can connect and will be issued with a IP address on the subnet 10.8.0.0/24 with the server having IP 10.8.0.1. However, at this point all the client and server will be able to do is send packets to each other on these IP addresses. Clients won't be able to “see” any computers on the server subnet (192.168.31.0/24) or route any other traffic over the VPN. As we are interested in a site-to-site VPN we would like the clients to be able to “see” everything on the local network. If you’d like to check that your very simple VPN server is working by logging on with the client contine to “Start a simple client”. If you prefer to do the necessary work on the server before logging off skip to “Expand the scope of the connection”. |
|||||
| Last Updated ( Monday, 30 August 2021 ) |