| Setting Up Site-To-Site OpenVPN |
| Written by Sam James | |||||
| Monday, 30 August 2021 | |||||
Page 3 of 4
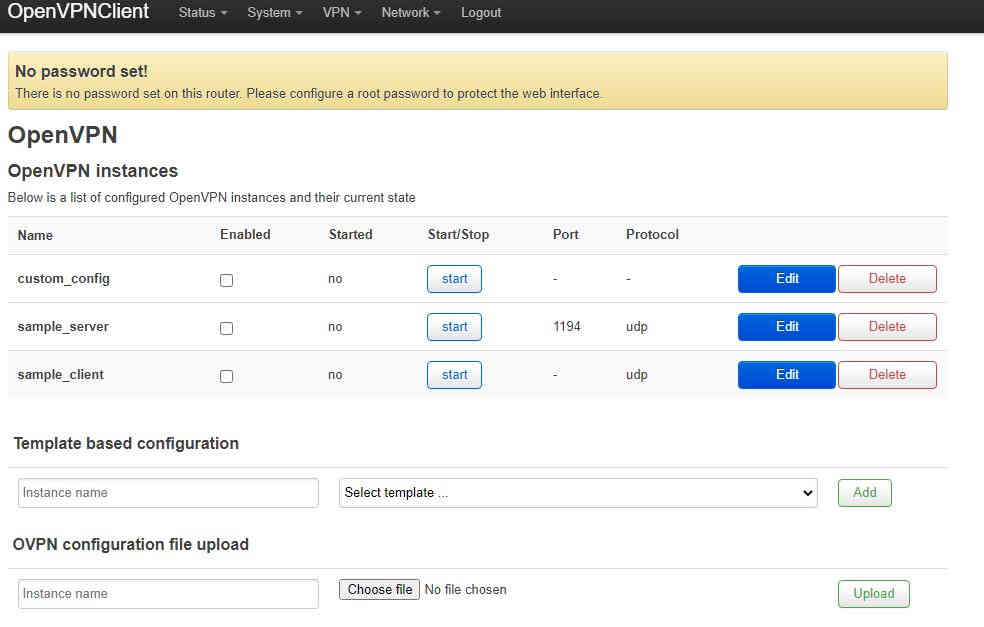
Start a simple clientAgain if you installed luci-app-openvpn on the client we can use this to set up a simple client with most common options already filled in. Log in to the client with a web browser and select VPN→OpenVPN form the top menu. Then click the Edit button beside “sample_client”:
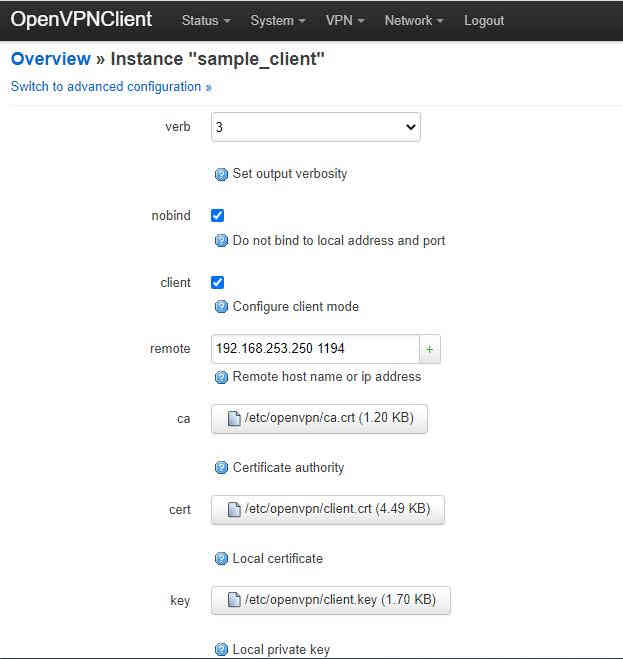
If you copied the certificates into /etc/openvpn/ then these fields should already be correct, so the only setting required is the IP address of the server. In our setup this is 192.168.253.250 on port 1194:
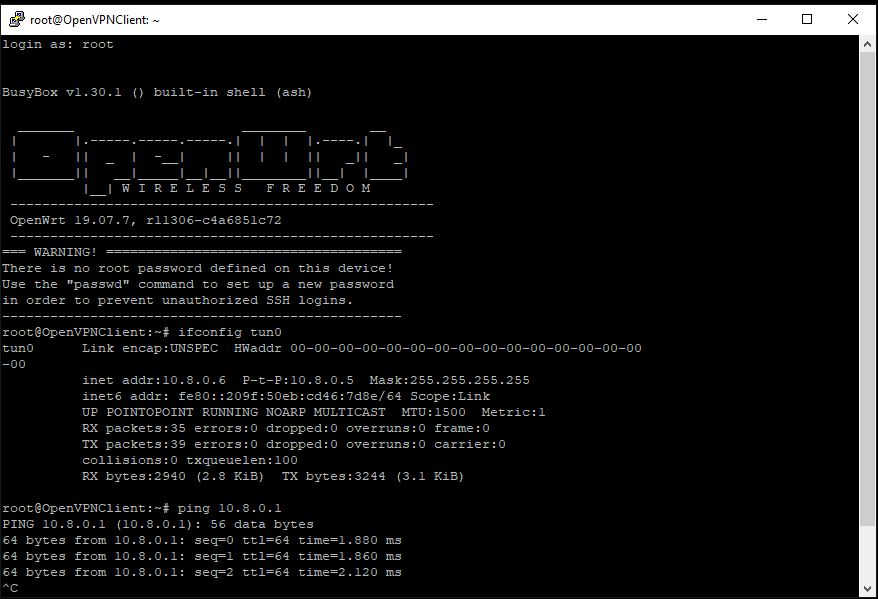
Again you can check the logs to see that the client has connected correctly. If you now SSH into the client router you should find that it has a new network interface called TUN0 with an IP address on the 10.8.0.0/24 subnet. You should also be able to ping the server on 10.8.0.1:
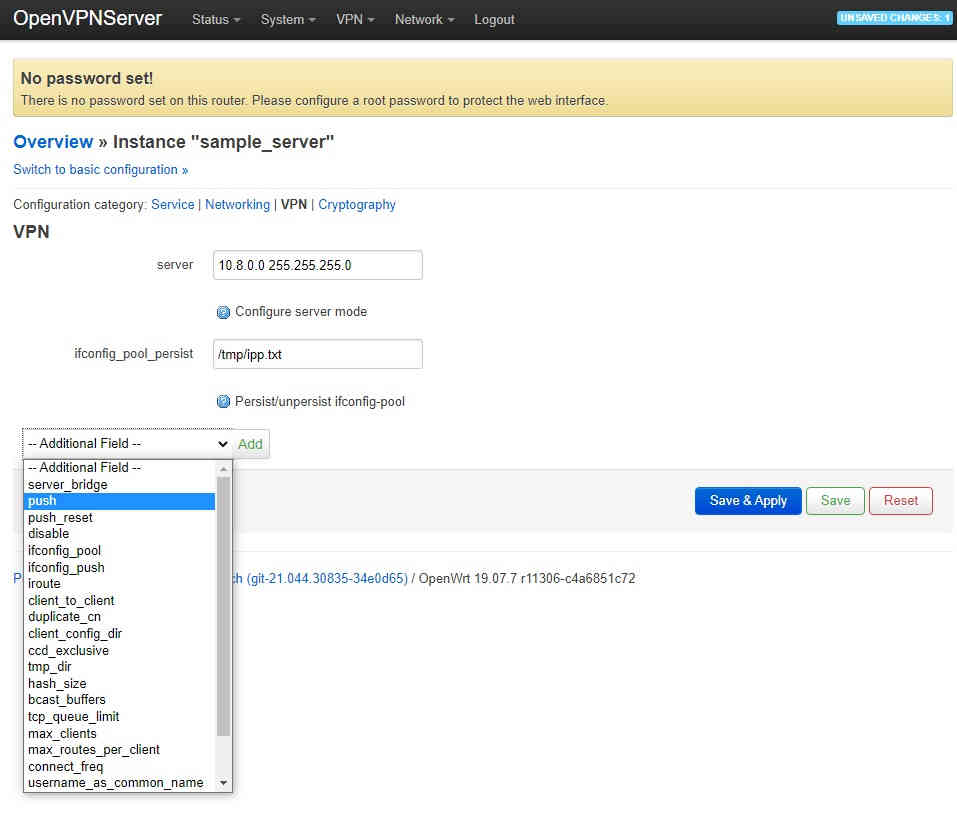
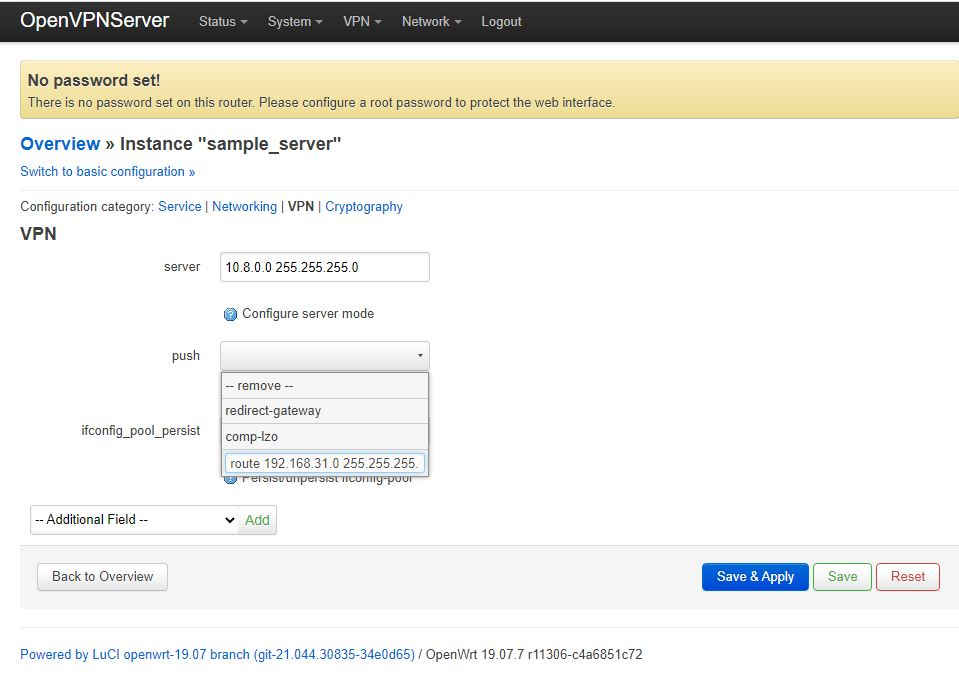
Expand the scope of the connectionExpanding the scope of the connection using LuCI is the bit that isn’t very well documented. We will start by adding the routing of packets bound for LAN of the server from the client. First we need to tell OpenVPN to advertise the 192.168.31.0/24 LAN to the client. This can be done by opening a web browser to the server and selecting VPN→OpenVPN in the top menu. Next click the Edit button of sample_server, assuming you have so far been using this as the template for your VPN server, and now click “Switch to advanced configuration »” at the top of the page followed by selecting “VPN” from the configuration category list. Finally select “push” from the “Additional Field” dropdown box at the bottom of the page and click “add”:
The default is that push comes prefilled with “redirect-gateway”. This will send all internet traffic through the VPN connection on the client. If this is what you want to do you you may leave it. However, you will need to correctly configure the firewall which we will not cover in this article. Assuming you are wanting a site-to-site VPN, delete this default and enter a “custom” entry route 192.168.31.0 255.255.255.0 as shown below:
Remember to click “Save & Apply” and to make sure the changes have fully propagated to both the server and client - stopping both and restarting in sequence is a good idea. At this point you should find the client router can ping the server on its local IP, in our case 192.168.31.1, but it won’t be able to reach any other computers on this subnet. This is due to the fact the firewall on the server will not forward any packets from the VPN device, TUN0, to the local LAN. Assuming we trust all parties on both LAN networks, i.e. these are two networks we own, the correct way of allowing this traffic is to add the TUN0 device to the LAN firewall zone. If you would like to do more complicated packet filtering, that is beyond this article. |
|||||
| Last Updated ( Monday, 30 August 2021 ) |